Order 24/7


StampinUp

Current Catalog

Holiday Catalog

Princess+Badge.png
Mojo Monday Blinkie

Copyright

The content in this blog (including text, photographs, and design work) is the sole responsibility and © of Shannon Jaramillo as an independent Stampin'Up! demonstrator. The use and content of classes, services or products offered are not endorsed by Stampin'Up!

Follow Me via Email

Enter your email address:

Social Links
Search

Entries in Seasonal (3)

Tuesday
Nov192013

Sweater Weather Seasonal Decor

Hello again! Today I have a little project to share with you. One that has me out of my card comfort zone and into the world of 3-D, paint, sandpaper, and glue guns. But it was worth it! These little guys are going to go with me to work and bring a little seasonal cheer to my office!
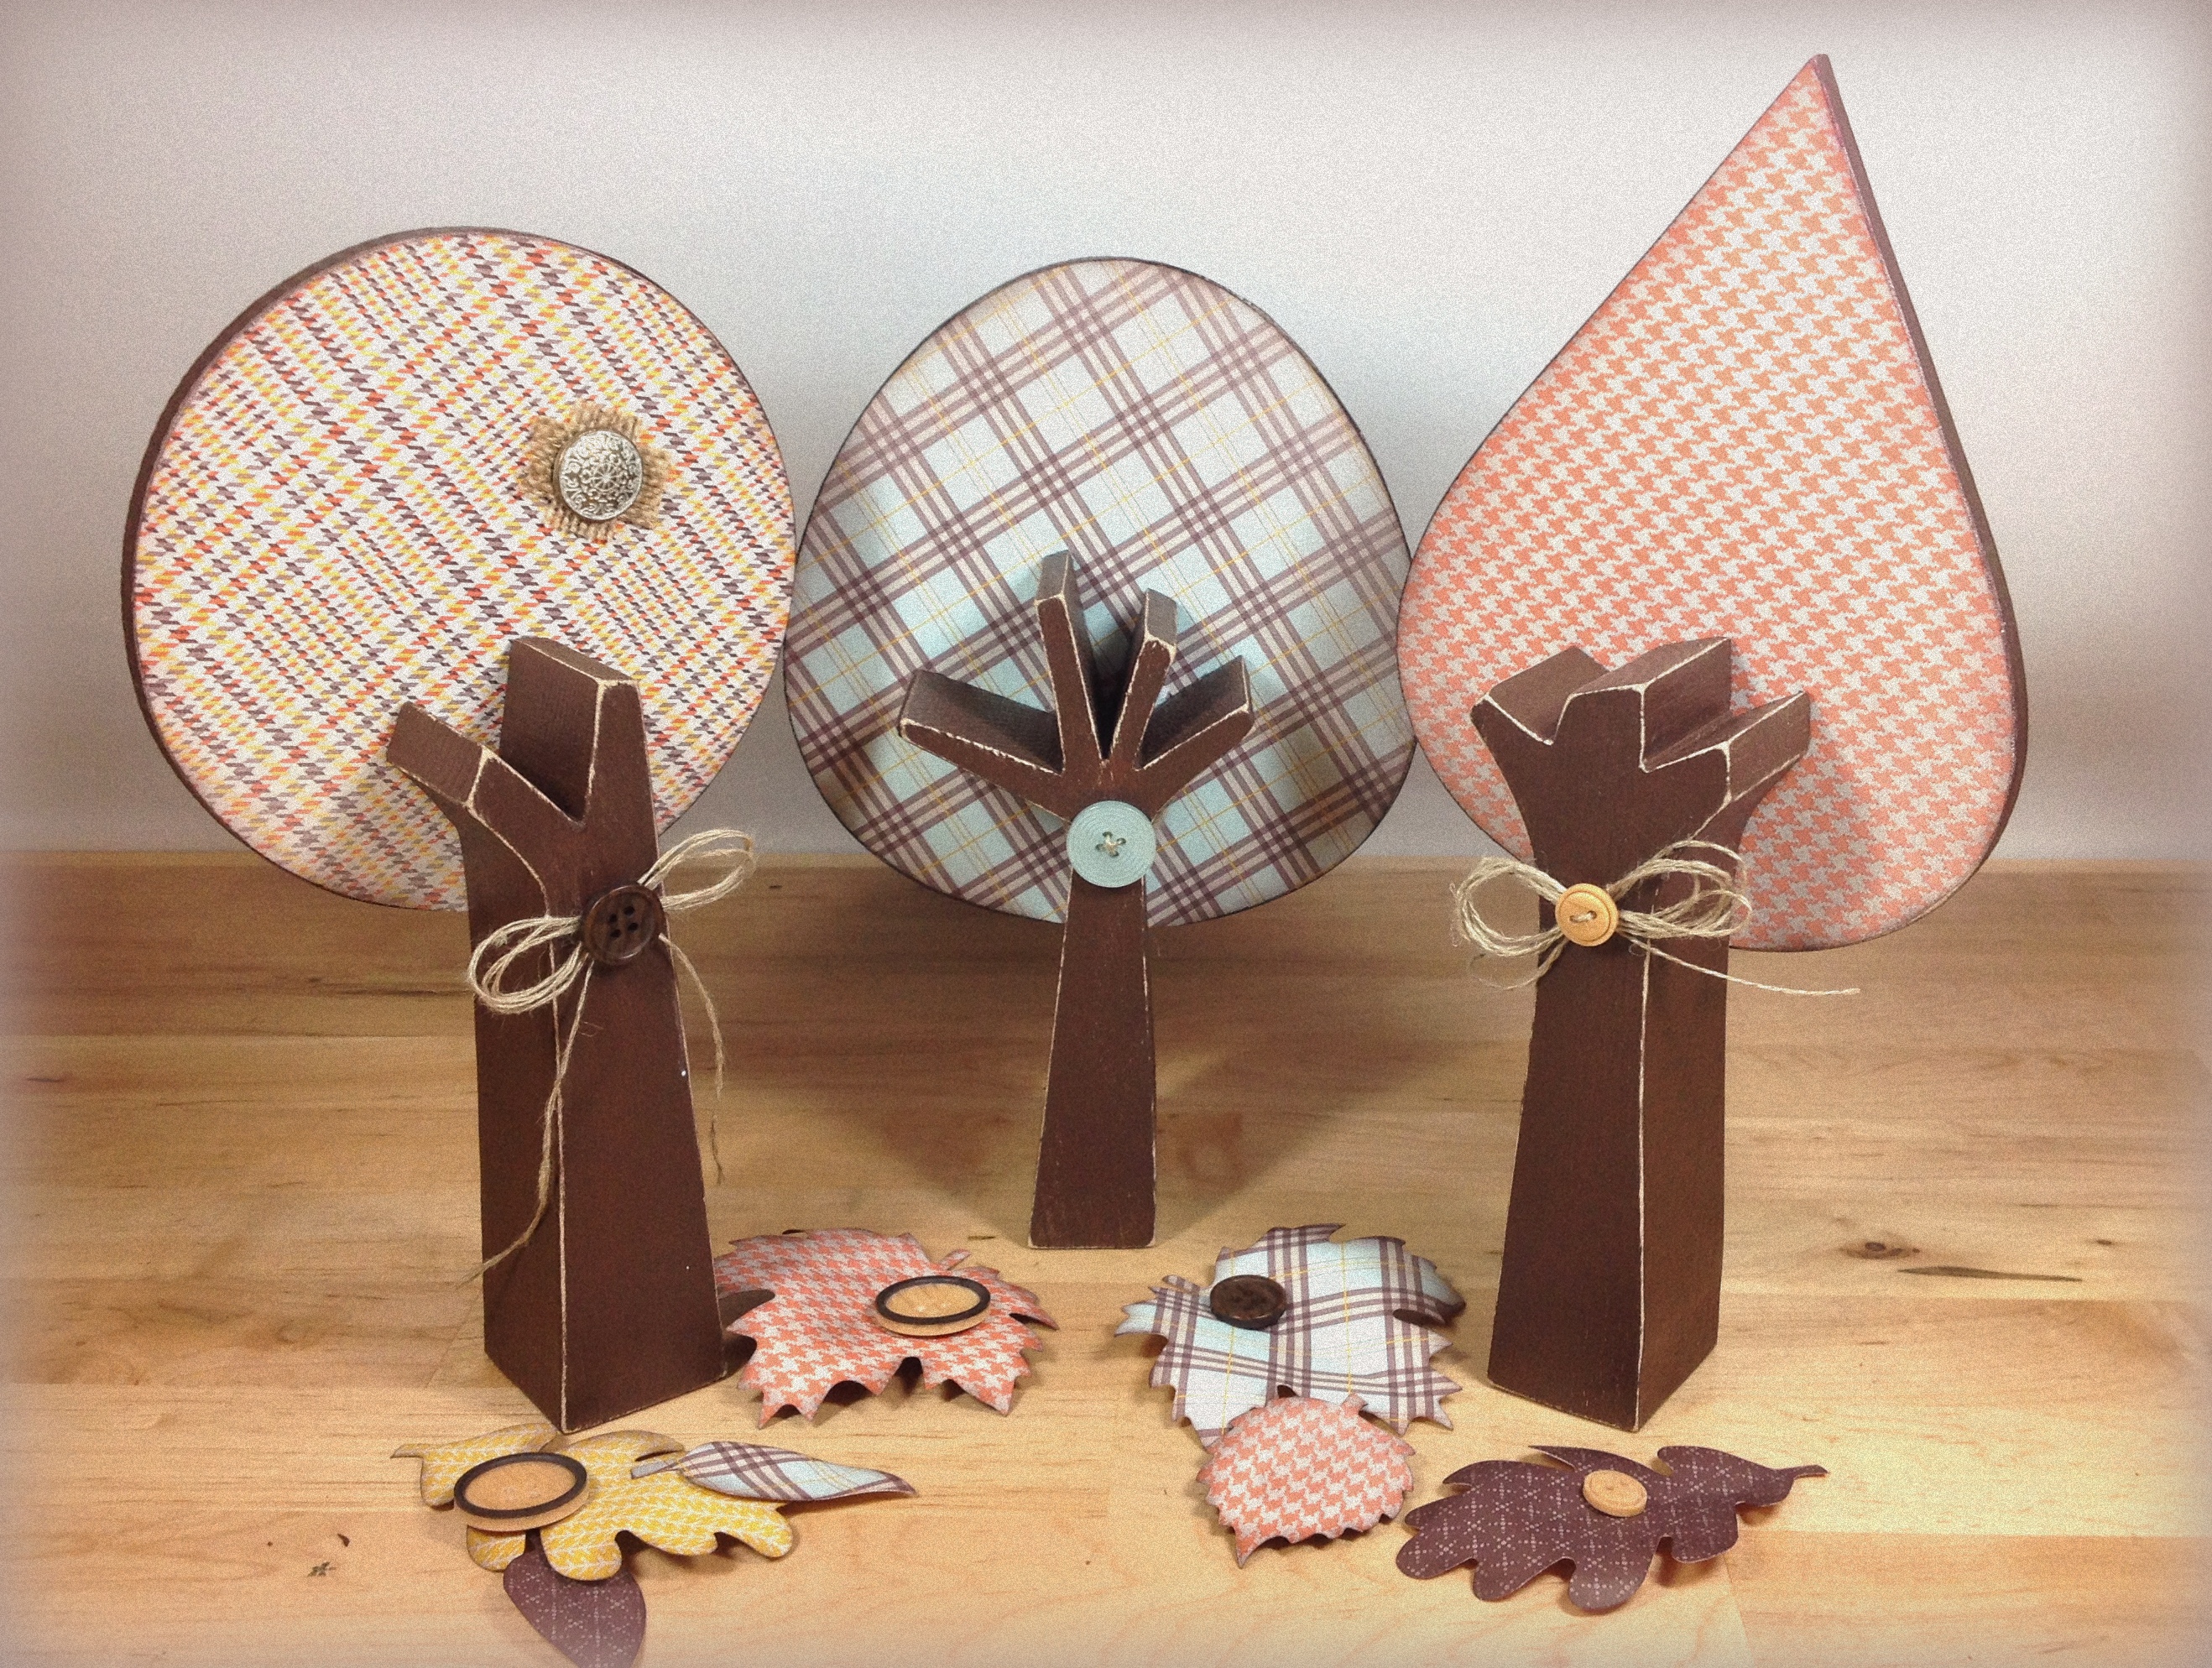
Aren't they FUN??

I found these cute little trees online here and I knew at once that they had to come live with me!

The wood pieces come unfinished and unassembled so I ran and picked up some generic craft paint and set right to work! After several coats of paint I sanded the edges of the trunks down to give them a rustic feel.

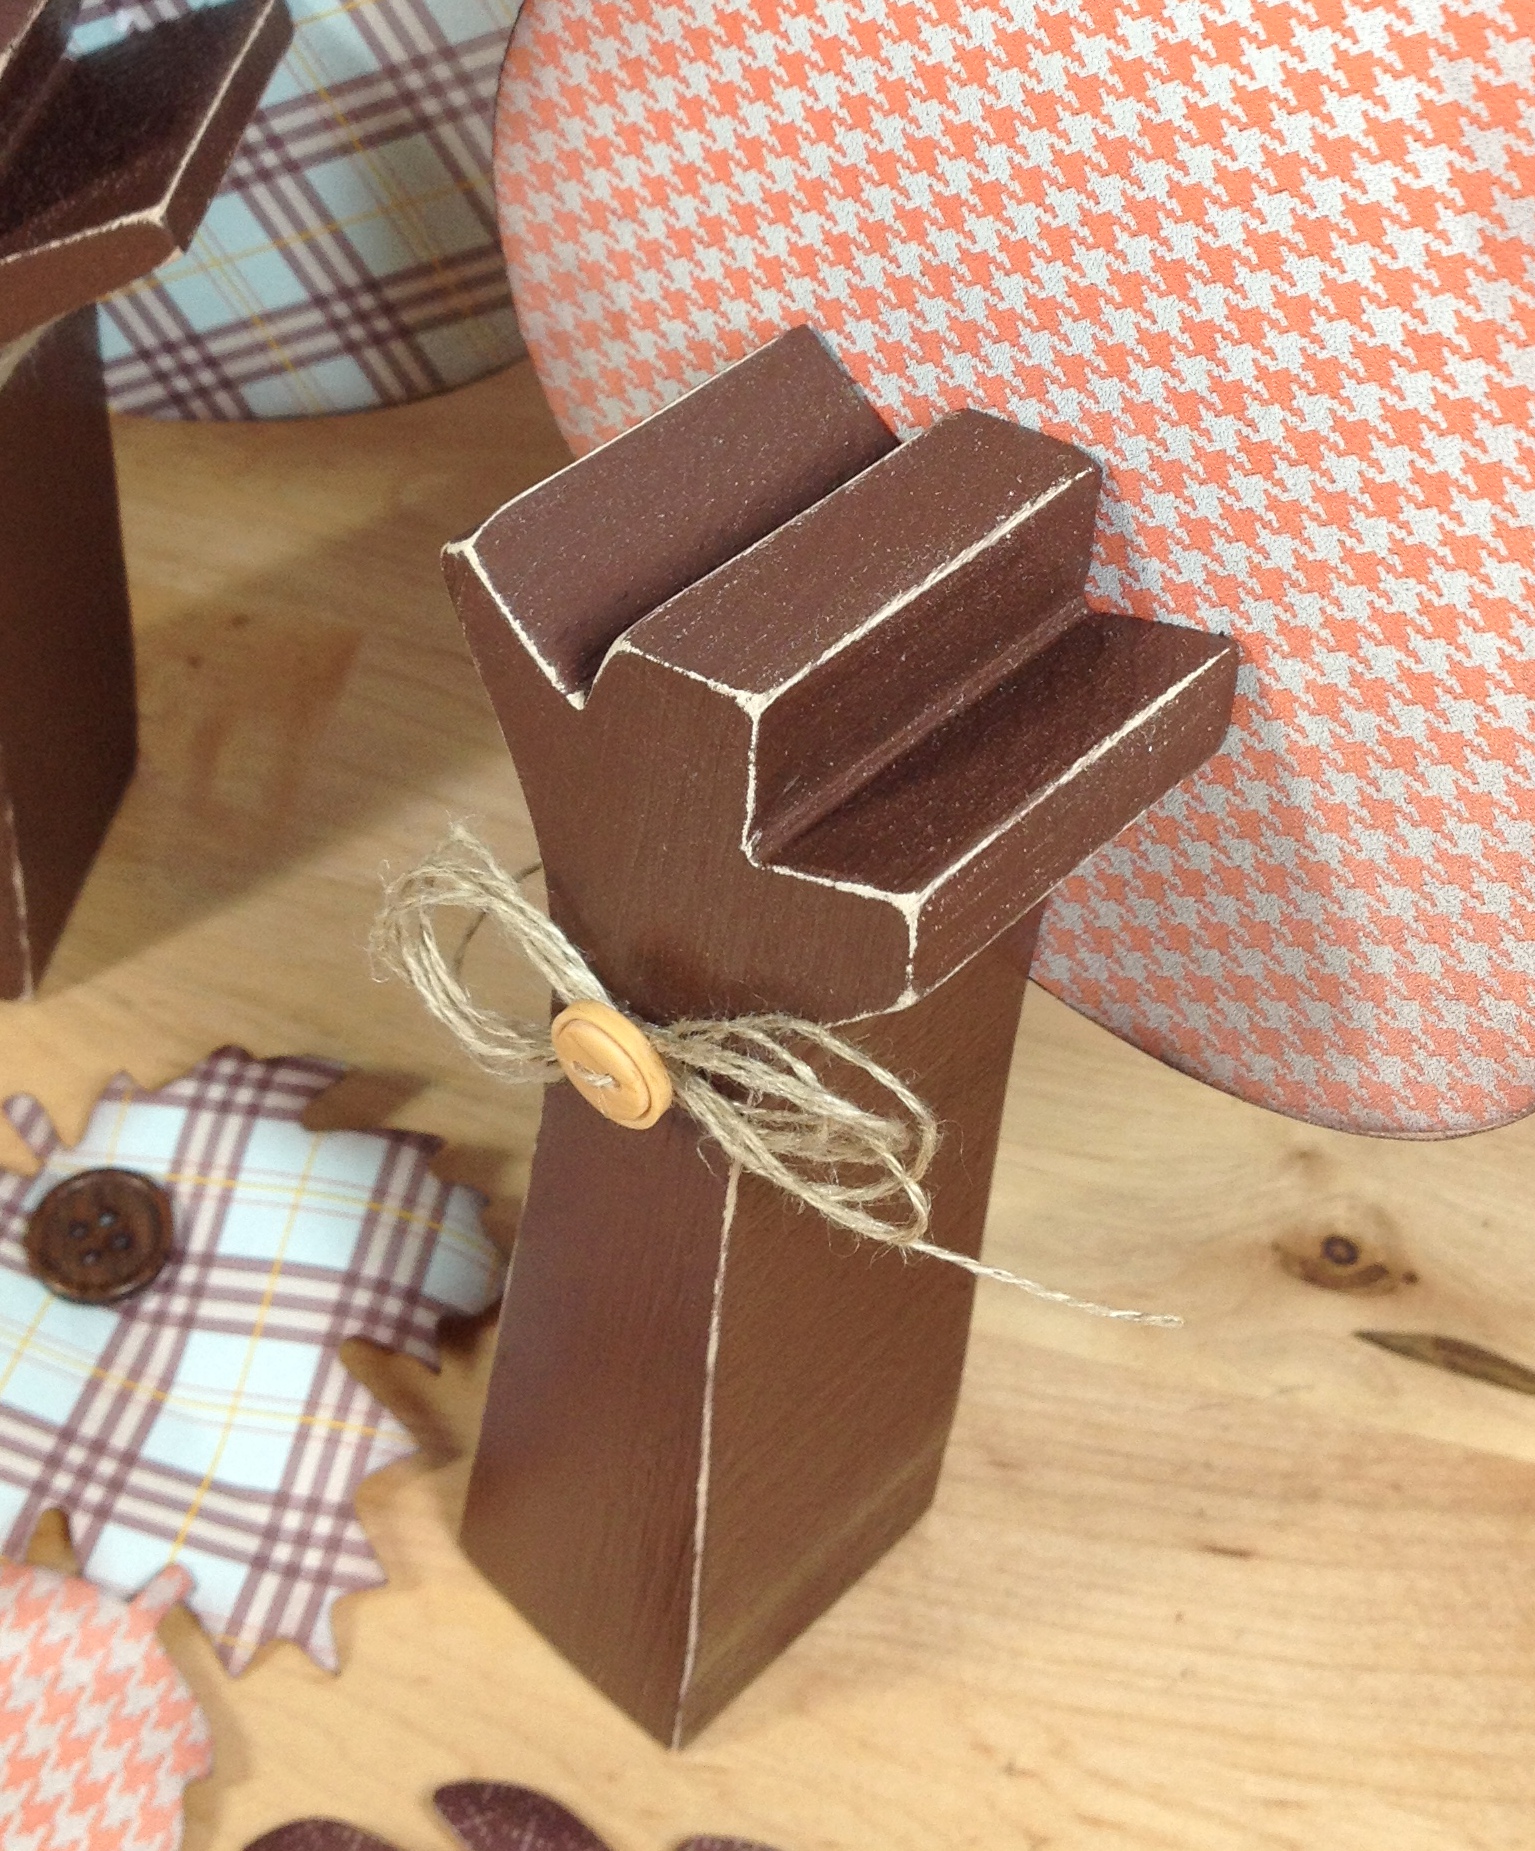
I then adhered Stampin' Up!'s Sweater Weather Designer Series Paper to the trees with Modge Podge and used my glue gun to glue the trunks to the tree tops. I sponged Chocolate Chip ink around the edges of the paper to add definition and then decorated with Linen Thread and buttons! EZ Peasy!

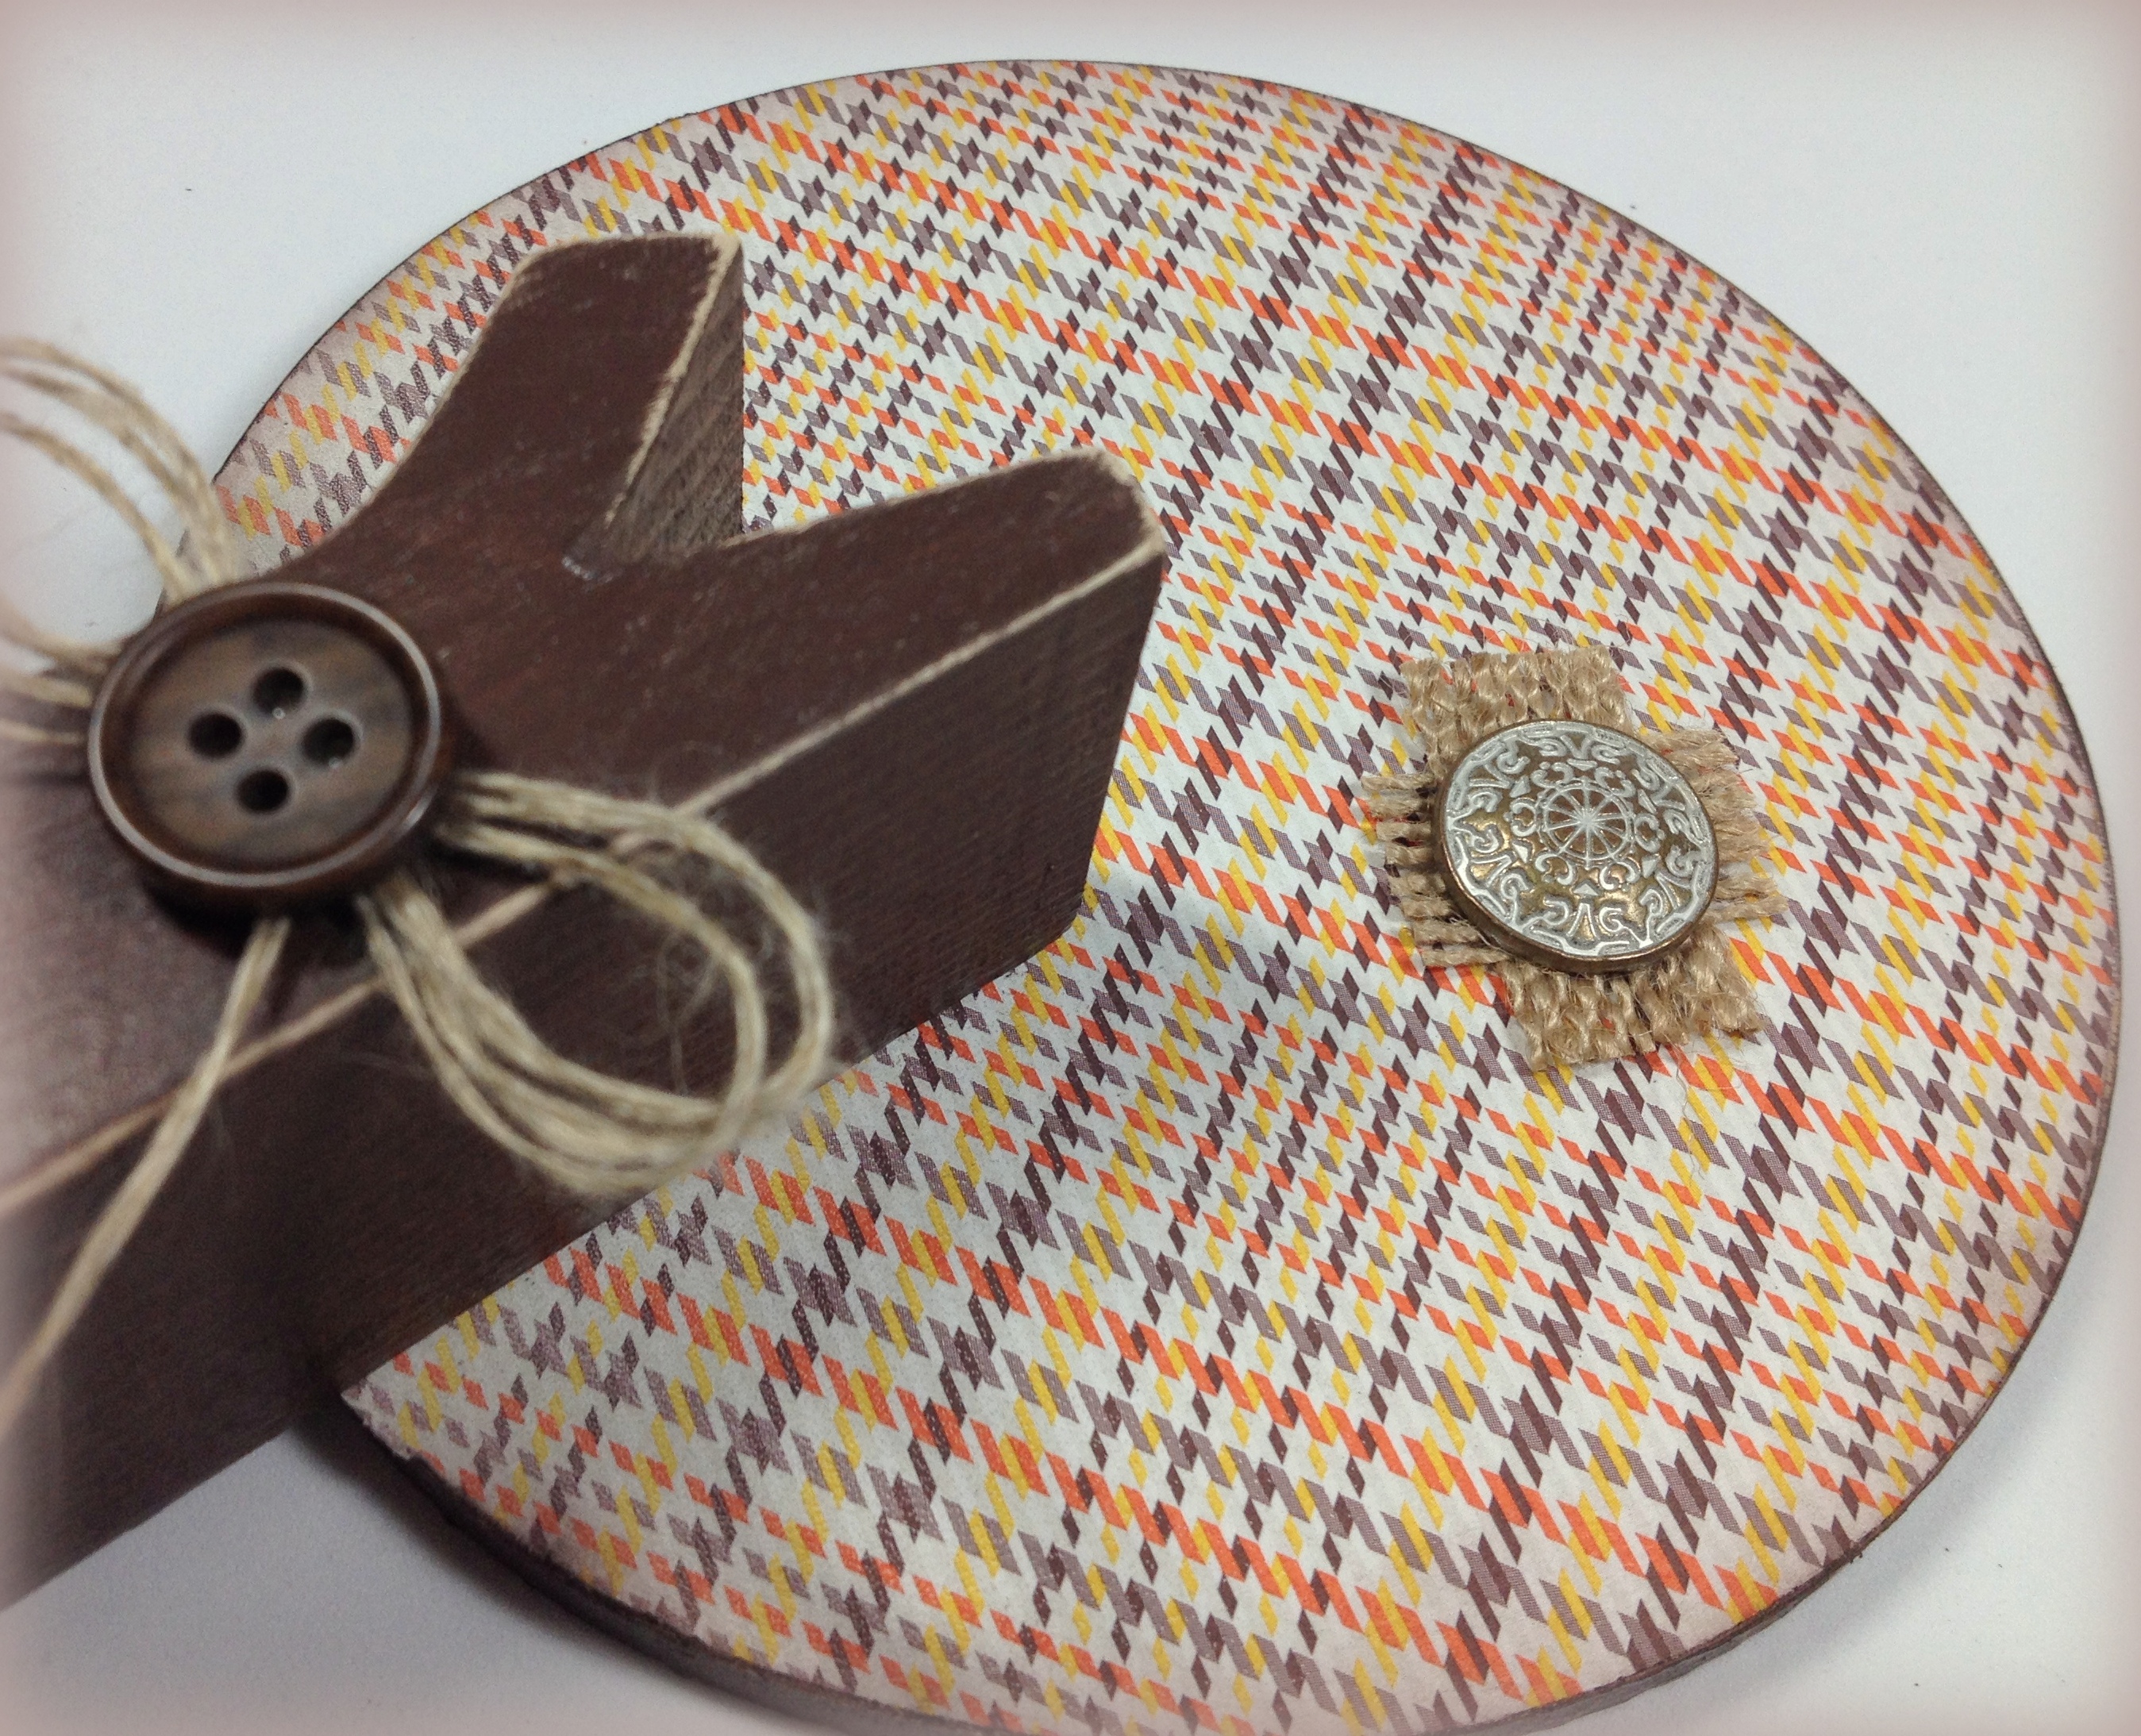
Here's a closer look at the sponging and details :)

I would love to hear what you think of my fall trees!

Stampin Supplies: 

Stamps: None

Paper: Sweater Weather (132184) Designer Series Paper

Ink: Chocolate Chip (126975) Classic Stampin' Pad

Tools: Sponge Daubers (102892)

Embellishments: Naturals Designer Buttons (127554); Subtles Designer Buttons (130030); Natural Linen Thread (104199); Antique Brads (117273); 1 1/4" Burlap Ribbon

Other: Wood Trees, Craft Paint, Fine Sandpaper, Modge Podge, Glue Gun

Wednesday
Oct232013

Witches' Brew Meets The Best of Halloween

I finally decided to get into the Halloween spirit and whip up a few cards! And since I was diving in, why not break out the Circle Thinlit Card Dies that have been sitting abandoned on my craft table while I decide whether or not to take the plunge and try something new...

And I decided...I like them!! Since I haven't used much DSP (Designer Series Paper) in awhile, I decided to throw that in the mix too...

I think for me the issue with using the Thinlit Card Dies has been not having a place to write a greeting. I just have not been able to wrap my head around that. I finally did some poking around on the internet and found some videos that actually extended the card to create another fold, thereby adding enough room to write a message. Perfect!!

Isn't the back just darling? And look! A place to write a message...how awesome is that!! There are some VERY creative people out there working hard for us and I thank them!

Here's another view...

This card looks like it took a lot of time but honestly, the die does all the work for you. I just trimmed the DSP to 1/4" smaller than the card base, centered each, and adhered. EZ Peasy! The sentiment is from the Best of Halloween 25th Anniversay Stamp Set and it is my FAVORITE...I just LOVE the images! I used one stamp and using my Stamp-A-Ma-Jig, lined it up and repeated.

Isn't this haunted house fabulously creepy? It makes me think of the house in the Stephen King novel 'Salem's Lot...I'm just sayin! I embossed the image using black embossing powder and colored in the windows and the moon with a Blender Pen and my Summer Starfruit Stampin' Marker. It's really very easy to use a blender pen. Using the broad tip of the Stampin' Marker I scribbled some ink onto a Clear Mount Block (really). Then I just used my Blender Pen to pick up some of the ink and applied it to my card. That's it! The trick is to use a little bit of ink at first and add until you are satisfied. I also sponged black ink aound the edges of my scallop, which happens to be one of the dies included in the Circle Card Thinlits Dies, and done!

I hope you enjoyed today's post, I will be posting more Halloween cards so please stop back soon!

Stampin Supplies:

Stamps: Best of Halloween (134381)

Paper: Very Vanilla (101650), Basic Black (121045), Cardstock; Witches' Brew Designer Series Paper

Ink: Versamark (102283) Pad; Jet Black (101406) StazOn Ink Pad; Pumpkin Pie (126945) Classic Stampin' Pad; 2012-2014 (126856) Stampin' Write Markers

Tools: Big Shot (113439), Circle Card Thinlits Dies (133480), Black (109133) Stampin' Emboss Powder; Heat Tool (129053); Stampin' Trimmer (126889), Stamp-A-Ma-Jig (101049), Blender Pen (102845); Stampin' Dimensionals (104430)

Embellishments: None

Thanks for stopping by!


Friday
Sep062013

Gently Falling in Fall - PPA170 Color Challenge 

Hello there and Happy Fall to you! Officially anyway...in my neck of the woods it was over 100 today and fall weather is still months away! Still...when the kids go back to school my mind automatically turns to decorating for Fall and Halloween (when we finally have some leaves and cool weather) and preparing for Christmas, but shhhh...we won't go there right now :)

Today I used a wonderful color combination from the design team over at Pals Paper Arts.

I love, love, love this combination and immediately had a card in mind for it...


What do you think? Hmmm...that Crushed Curry looks awfully BRIGHT to me! Well, this is what I came up with:

What do you think now? I'm lovin' it! I took the colors of the challenge and put them on top of a Sahara Sand card base. I chose to highlight Early Expresso and just use small doses of Midnight Muse and Crushed Curry. I used the Autumn Accents Bigz Die to die cut my leaves and then stamped onto the die cuts using the Wonderfall Stamp Set (and my trusty Stamp-A-Ma-Jig).

Once I started layering my elements onto the card I HAD to add the Woodgrain Background Stamp Set. Then I HAD to use the Stampin' Distress Tool to rough up the edges of the cardstock. Then I thought...maybe I can distress the leaves too? So I picked up the distressing tool and just kept right on distressing! I was so happy with the result...but wait, I wonder what it would look like if I sponged the edges??? Loved that too! So I kept right on sponging everything that would stand still :) 

I added some twine, but still...something was missing! So I looked and looked and found the new 1 1/4" Burlap Ribbon from the holiday catalog and knew that was the missing element! I snipped and tugged at the threads until it looked right...and then realized that it HAD to be sponged too...lol. Whew! I thought the Early Expresso button with a twine bow was the perfect final touch. 

I chose not to add a sentiment so that this card would be ready at hand for whatever the occasion calls for...

So what about you? Are YOU ready for fall? Have you decorated? I think, after this card, the juices are flowing and it's time to dig into those decorations!

I hope you have enjoyed my post...thank you so very much for stopping by!

Stampin Supplies:

Stamps: Wonderfall (128087), Woodgrain Background Stamp (128763)

Paper: Sahara Sand (121043), Early Expresso (119686) Cardstock

Ink: Sahara Sand (126976), Early Expresso (126974), Crushed Curry (131173), Midnight Muse (126860) Classic Stampin' Pad

Tools: Big Shot (113439), Autumn Accents Bigz Die (127812), Stampin' Trimmer (126889), Stamp-A-Ma-Jig (101049), Stampin' Distress Tool (127562), Glue Dots (103683), Stampin' Dimensionals (104430), Stamping Sponges (101610)

Embellishments: Linen Thread (104199), Neutrals Designer Buttons (130031), 1-1/4" Burlap Ribbon (132140)