Order 24/7


StampinUp

Current Catalog

Holiday Catalog

Princess+Badge.png
Mojo Monday Blinkie

Copyright

The content in this blog (including text, photographs, and design work) is the sole responsibility and © of Shannon Jaramillo as an independent Stampin'Up! demonstrator. The use and content of classes, services or products offered are not endorsed by Stampin'Up!

Follow Me via Email

Enter your email address:

Social Links
Search

Entries in Stampin Up Punches (42)

Saturday
Jun082013

Mosaic Madness Mr & Mrs

Follow Me on Pinterest

Today's project is a CASE from page 72 of the new Stampin' Up! Catalog...I needed a wedding card and just fell in love with the simple elegance of this card! Love, love, love the combination of Crushed Curry and Smoky Slate!

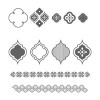
The coordinating stamps in the new Mosaic Madness stamp set give you endless creative possibilities and the matching Mosaic Punch just makes putting this card together a snap! I did make an adjustment to the original card by layering the Very Vanilla top layer onto a layer of Smoky Slate and Crushed Curry. I thought the added layers of color gave the card a bit of 'POP'!

I don't currently own the Ticket Duo Builder Punch (gasp!) so I improvised! I have LOTS of thin strips of Whisper White cardstock in my scrap pile so I chose one and stamped this lovely image from the Petite Pairs stamp set. I snipped the strip down to what I thought looked like the appropirate length and then snipped again on the top and bottom until it looked right. Next I took my circle punch from the Itty Bitty Shapes Punch Pack and inserted the ends of my paper in and punched half circles on all four corners and voila! an itty bitty ticket shape! I then used my Stampin' Trimmer to trim down a scrap piece of Crushed Curry cardstock to layer behind the sentiment and snipped the ends into a banner. A few Stampin' Dimensionals for added depth and four itty bitty Pearl Basic Jewels for the jewelry.

I forgot to snap a picture of the inside of the card but I added the sentiment "Wishing You a Lifetime of Happiness" from the One in a Million stamp set.

I hope you have a wonderful weekend...I plan to spend some time in my stamp room playing with my new goodies, setting up my fall class schedule, and preparing to share some of my organizational tips in upcoming posts.

If you haven't browsed through the new catalog yet, click here and take a few minutes to thumb through...it's wonderful! Or if you prefer to have the actual catalog in hand, Please contact me, I would love to send you a complimentary copy with a only $5 shipping cost. 

Stampin Supplies:

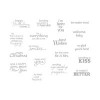
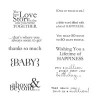
Stamps: Mosaic Madness (130249), Petite Pairs (122497), One in a Million (126382)

Paper: Very Vanilla (101650), Crushed Curry (131199), Smoky Slate (131202) Cardstock

Ink: Crushed Curry (131173), Smoky Slate (131179), Baked Brown Sugar (131174) Classic Stampin' Pad

Tools: Stampin' Trimmer (126889), Mosaic Punch (131267), Itty Bitty Shapes Punch Pack (118309)

Embellishments:  Pearl Basic Jewels (119247)

Thanks for stopping by!

Friday
Jun072013

Simply Sketched Birthday

Follow Me on Pinterest

Today's CAS (Clean and Simple) card was inspired by two things: firstly, my promise to a fellow Pal that I would step up and try my hand at watercoloring; and secondly by a delightful layout sketch over at Create with Connie and Mary.

Why does trying something new always feel like such a challenge? My personal excuse is that I am self-taught. I have been to exactly TWO group stamping experiences in my lifetime. Everything I have learned, I have learned by visual aid, either picture tutorials or online videos. Thank heavens there are demonstrators out there who share their knowledge! So, back to my card...trying new things takes me out of my comfort zone and requires that I research each new technique before trying it. Add to that serious issues with perfection and it's a wonder I try anything new at all!

Honestly, this was so easy I can't believe how much I built it up! I stamped the image with Staz-On Ink, then dabbed a Blender Pen directly onto my Pink Pirouette Classic Ink Pad, scribbled away just a bit of the color onto scratch paper, and added ink to the image. Ink and Repeat. Then with the same technique I added a bit of Crumb Cake ink to the stems. That's it! So ezpeasy!

The color scheme here was chosen from my Color Coach: Crumb Cake, Pool Party, and Pink Pirouette. How dainty and pretty and a perfect compliment to the delicate images in Stampin' Up!'s new hostess set Simply Sketched and this pattern from the Quatrefancy Specialty Designer Series Paper.

Jewelry? Of course! I tried VERY hard to add some ribbon but it just seemed to overpower the layout so I opted to leave it off and add some Candy Dots instead. I knew I loved them at first sight but tonight when I realized I had a Candy Dot in EVERY SHADE, my love for them notched up even higher. And all for $5.95 per color family! What a deal I tell you!

Today's project took about 15 minutes to complete, next time it will take less since I won't be so nervous to watercolor! 

I hope I have inspired you to try something new and thank you to Windy for inspiring me!

Stampin Supplies:

Stamps: Simply Sketched (Hostess)

Paper: Crumb Cake (120953), Pink Pirouette (111351), Whisper White (100730) Cardstock; Quatrefancy Specialty Designer Series Paper (130141)

Ink: Jet Black StazOn Ink Pad (101406); Crumb Cake (126975), Pink Pirouette (126956) Classic Stampin' Pad

Tools: Stampin' Trimmer (126889), Blender Pen (102845), Scallop Oval Punch (119856), Large Oval Punch (119855)

Embellishments:  Subtles Candy Dots (130933)

Thanks for stopping by!

Tuesday
Apr302013

Gingham Garden Birthday - PPA157 Sketch Challenge

Follow Me on Pinterest

I am very pleased to share this project with you today, created with a wonderful sketch from the Pals Paper Arts design team:

The new catalog will be available on May 31st but as a Stampin' Up! Demonstrator I am allowed a sneak peek at the exciting new products and I am thrilled to share some of those new products with you on my card today! So without further ado...(insert drumroll) here is my creation:

You may notice this new delicious Designer Series Paper which I honestly think is my all-time favorite ever! The colors showcased here are Daffodil Delight, Melon Mambo, and Pear Pizzazz. And I have managed to feature not one, but TWO new stamp sets for you today:

One is a collection of stars, which I am just thrilled with, and the other is a new collection of sentiments, I can't say "love" enough! I chose this sentiment because I think it has so many options...we could be celebrating a birthday, or a baby, or a graduation, or a...well, you get the idea!

Thank you for stopping by and look for other sneak peeks at new product in the days and weeks to come!


Wednesday
Apr242013

Soho Subway Birthday - Freshly Made Sketches #83

Follow Me on Pinterest

An awesome sketch by Allisa posted today over at Freshly Made Sketches, I couldn't wait to get home and create something!

Isn't it just fab? Lots of clean lines and lots of room for interpretation. I knew I wanted to use another line of new Designer Series Paper to create a masculine birthday card...how did I do?

Isn't this new Designer Series Papeer just absolutely amazing? It's called "Soho Subway" and I think Stampin' Up! knocked it OUT OF THE PARK with this one!! I have used three of the patterns here on this project, I couldn't fit anymore on the card but check back because this one will appear again in another project soon! We ALWAYS need masculine cards, right? 

Here's a closer look at the paper:

The coordinating colors for this paper series are Crisp Cataloupe, Early Expresso, Island Indigo, Summer Starfruit, and Very Vanilla. At first I layered all of the pieces of DSP onto an Early Expresso Base but they seemed to be lost on top of that dark color so I tried layering each piece on Island Indigo. That just made everything look very busy so I stepped back and contemplated things. I tried Soft Suede as a base...still too dark. Very Vanilla was just too light. But Sahara Sand was just...yeah, you know where I'm going with that!

Sahara Sand it is...now how to add a bit of jazz without detracting from my "masculine" card?

  • I sponged all of the edges with Early Expresso Ink
  • I added subtle paper piercing to the right hand corners to visually balance out the weight of the busy pattern on the left
  • I chose a 'scruffy' image to keep with the masculine theme
  • I heat embossed the sentiment with Early Expresso embossing powder

Have you noticed the awesome new punch? It's called the "Artisan Label" punch and has a coordinating stamp set called "Label Love". Love, Love, Love! But on it's own on my card the punched sentiment seemed to get lost so I trimmed snippets of the Designer Series Paper into banners and attached them to my sentiment and popped the sentiment off the card with my trusty Stampin' Dimensionals!

Let's see...No ribbon? check. No buttons? check. I think my husband would approve! I would love to hear your thoughts on the new products or the card in general, so please if you have a moment won't you leave me a comment? 

Stampin Supplies:

Stamps: Label Love (coming soon)

Paper: Sahara Sand (121043) Cardstock; Soho Subway Designer Series Paper (coming soon)

Ink: Early Expresso (12974) Classic Stampin' Pad

Tools: Artisan Label Punch (coming soon), Essentials Paper-Piercing Pack (126187), Stampin' Pierce Mat (126199), Paper-Piercing Tool (126189), Stampin' Trimmer (126889), Stampin' Dimensionals (104430), Snail Adhesive (104332), Stampin' Sponges (101610)

Embellishments: None

Thanks for stopping by!

Wednesday
Apr102013

Welcome Baby - PPA156 Color Challenge

Follow Me on Pinterest

Today's challenge comes to you courtesy of the Pals Paper Arts Design Team. They work hard to bring us great sketches and color combinations to stretch our creativity! 

Wow, these colors just shouted "BABY" to me:

And I meant "BABY" in the most literal sense! I kept the background simple and clean and used embossing folders on the punched pennants for visual interest. I stamped an embellishment from the Pennant Parade Stamp Set, snipped it out with my paper snips and then adhered it, along with a brad in Certainly Celery, to one of the pennants. Bows at the ends of the banner finish it off quite nicely.

I stamped the sentiment in Marina Mist using the Classic Stampin' Pad. I then quickly sifted a bit of Clear Embossing Powder over the top and tapped the excess off. I applied heat to the embossing powder with Stampin' Up!'s AWESOME heat tool and within seconds the sentiment went from "pretty" to "pretty awesome!" 

I can't wait to do more embossing!! Do you like it as well? If so, please give embossing a whirl...it is so easy and REALLY makes an impact!

Stampin Supplies:

Stamps: One in a Million (126382), Pennant Parade (122742)

Paper: Whisper White (100730), Bashful Blue (105120), Certainly Celery (105125), Marina Mist (119682) Cardstock; Subtles (117152) Designer Series Paper Stack

Ink: Marina Mist (126962) Classic Stampin' Pad

Tools: Big Shot (113439), Houndstooth (123134) Perfect Polka Dots (117335) Chevron (127749), and Argyle (127750) Embossing Folders, Petite Pennants Builder Punch (122361), Clear Embossing Powder (109130), Heat Tool (129053), Stampin' Trimmer (126889), Stampin' Dimensionals (104430)

Embellishments:  3/16" Subtles Brads (119738), Whisper White Baker's Twine (124262)

Thanks for stopping by!

Page 1 ... 2 3 4 5 6 ... 9 Next 5 Entries »