Order 24/7


StampinUp

Current Catalog

Holiday Catalog

Princess+Badge.png
Mojo Monday Blinkie

Copyright

The content in this blog (including text, photographs, and design work) is the sole responsibility and © of Shannon Jaramillo as an independent Stampin'Up! demonstrator. The use and content of classes, services or products offered are not endorsed by Stampin'Up!

Follow Me via Email

Enter your email address:

Social Links
Search
Saturday
Nov232013

Clean and Simple Saturday - Best of Snow

I am just loving the new Best of Snow stamp set! This little snowman is just too ca-yoot!! I tried my hand at coloring, with a blender pen, which I don't do very often so please don't judge! 

I just love that Stampin' Up! makes Stampin' Write Markers in every color so you can quickly color coordinate your projects. For this project I just scribbled a bit of each color onto a clean Clear Mount Block and then used a blender pen to pick up and apply as much (or as little) color as I felt was needed to the snowman. And I felt that the sentiment "Happy Christmas" from the More Merry Messages Stamp Set was very fitting for this jolly snowman. I used Cherry Cobbler ink to match and to accentuate the Cherry Cobbler in his scarf...EZ Peasy!

Three little rhinestones finish the card off nicely and, I think, do a pretty good representation of glistening snowflakes!

A super simple card today...short on creation time but long on cuteness! Love this guy!

Have a wonderful weekend and thank you so much for stopping by!!

Stampin Supplies: 

Stamps: Best of Snow (134387), More Merry Messages (126402),

Paper: Whisper White (124302), Cardstock

Ink: Cherry Cobbler (126996) Classic Stampin' Pad; Assorted Stampin' Write Markers

Tools:  Stampin' Trimmer (126889); Stamp-A-Ma-Jig (101049); Stampin' Dimensionals (104430)

Embellishments: Rhinestones Basic Jewels (119246) 

Thursday
Nov212013

A Simple Thank You - PPA180 Sketch Challenge

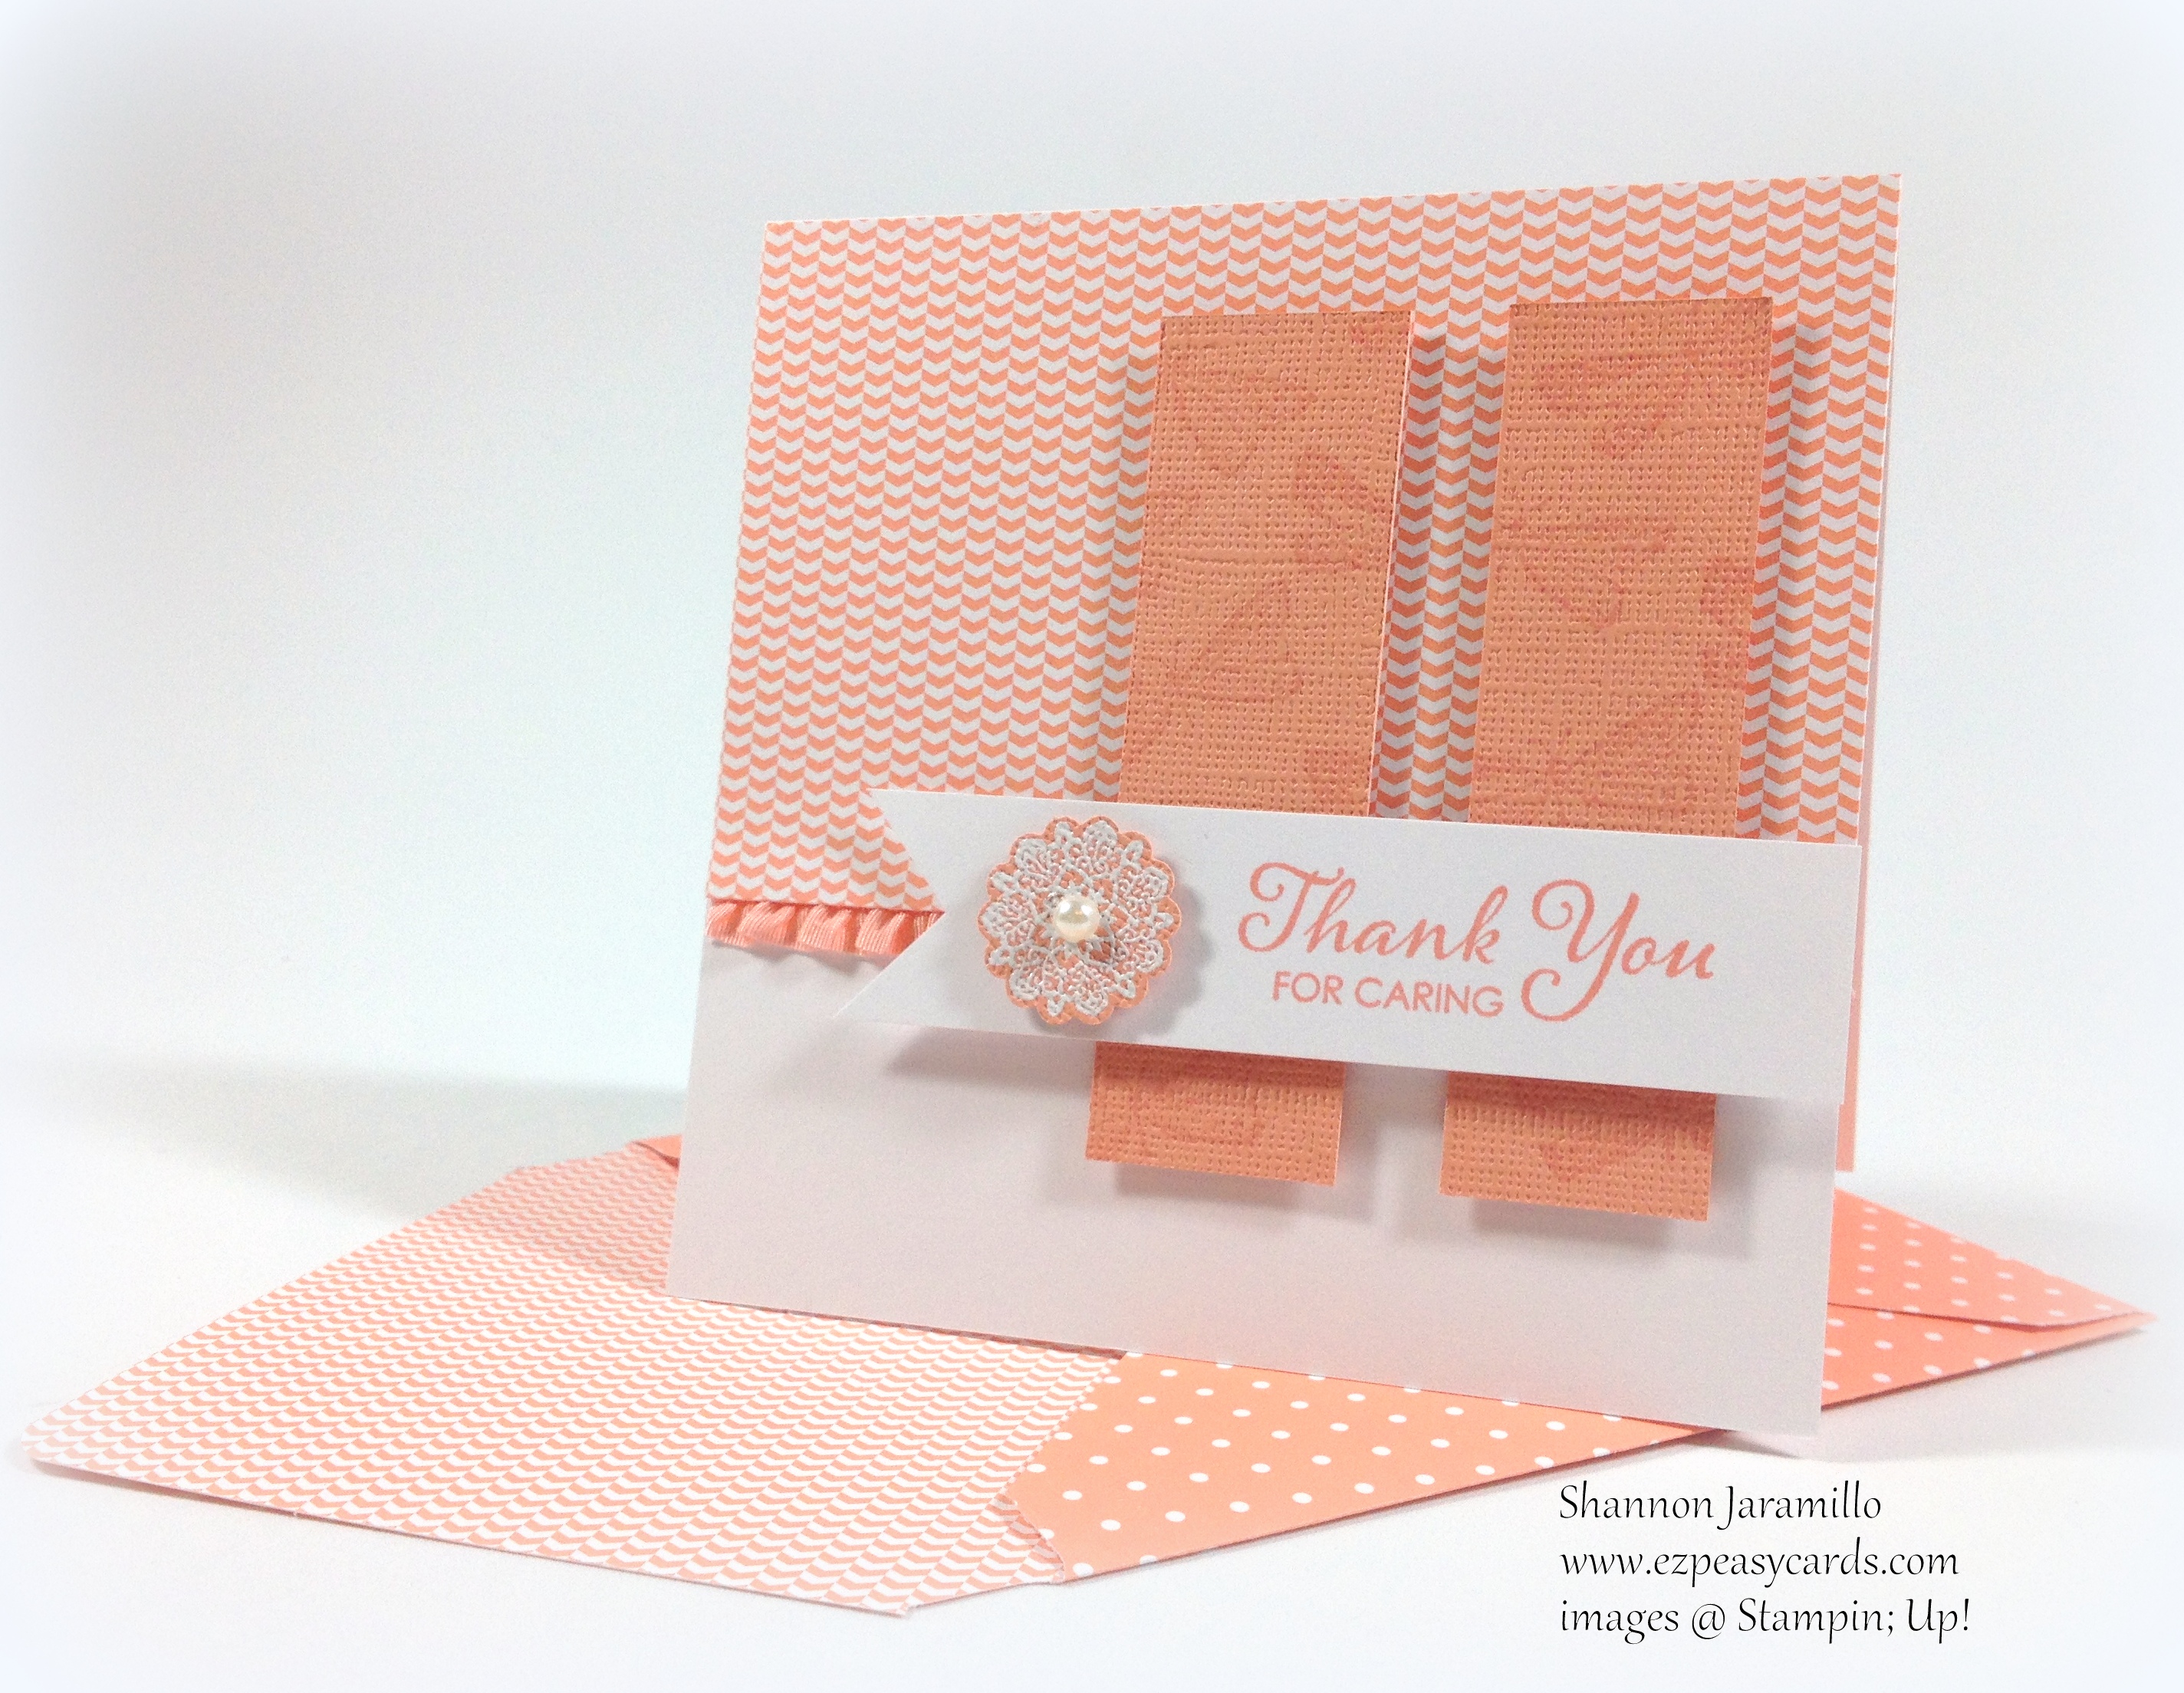
When I saw the Pals Paper Arts sketch this week, I threw in the towel. Really. There was just no way possible that I could work with a sketch with that many layers! So I put it out of my mind. But it kept sneaking back in because I hate to admit defeat. So I went back to look at it again and decided I really couldn't do it. Not a chance. But that sketch just wouldn't leave me alone! I finally realized that the only way for me to cope with all the layers was to simplify.  I chose to make a monochromatic card with a bright cheerful color and so pulled out Crisp Cantaloupe and set to work.

And here is the sketch that caused me so much angst:

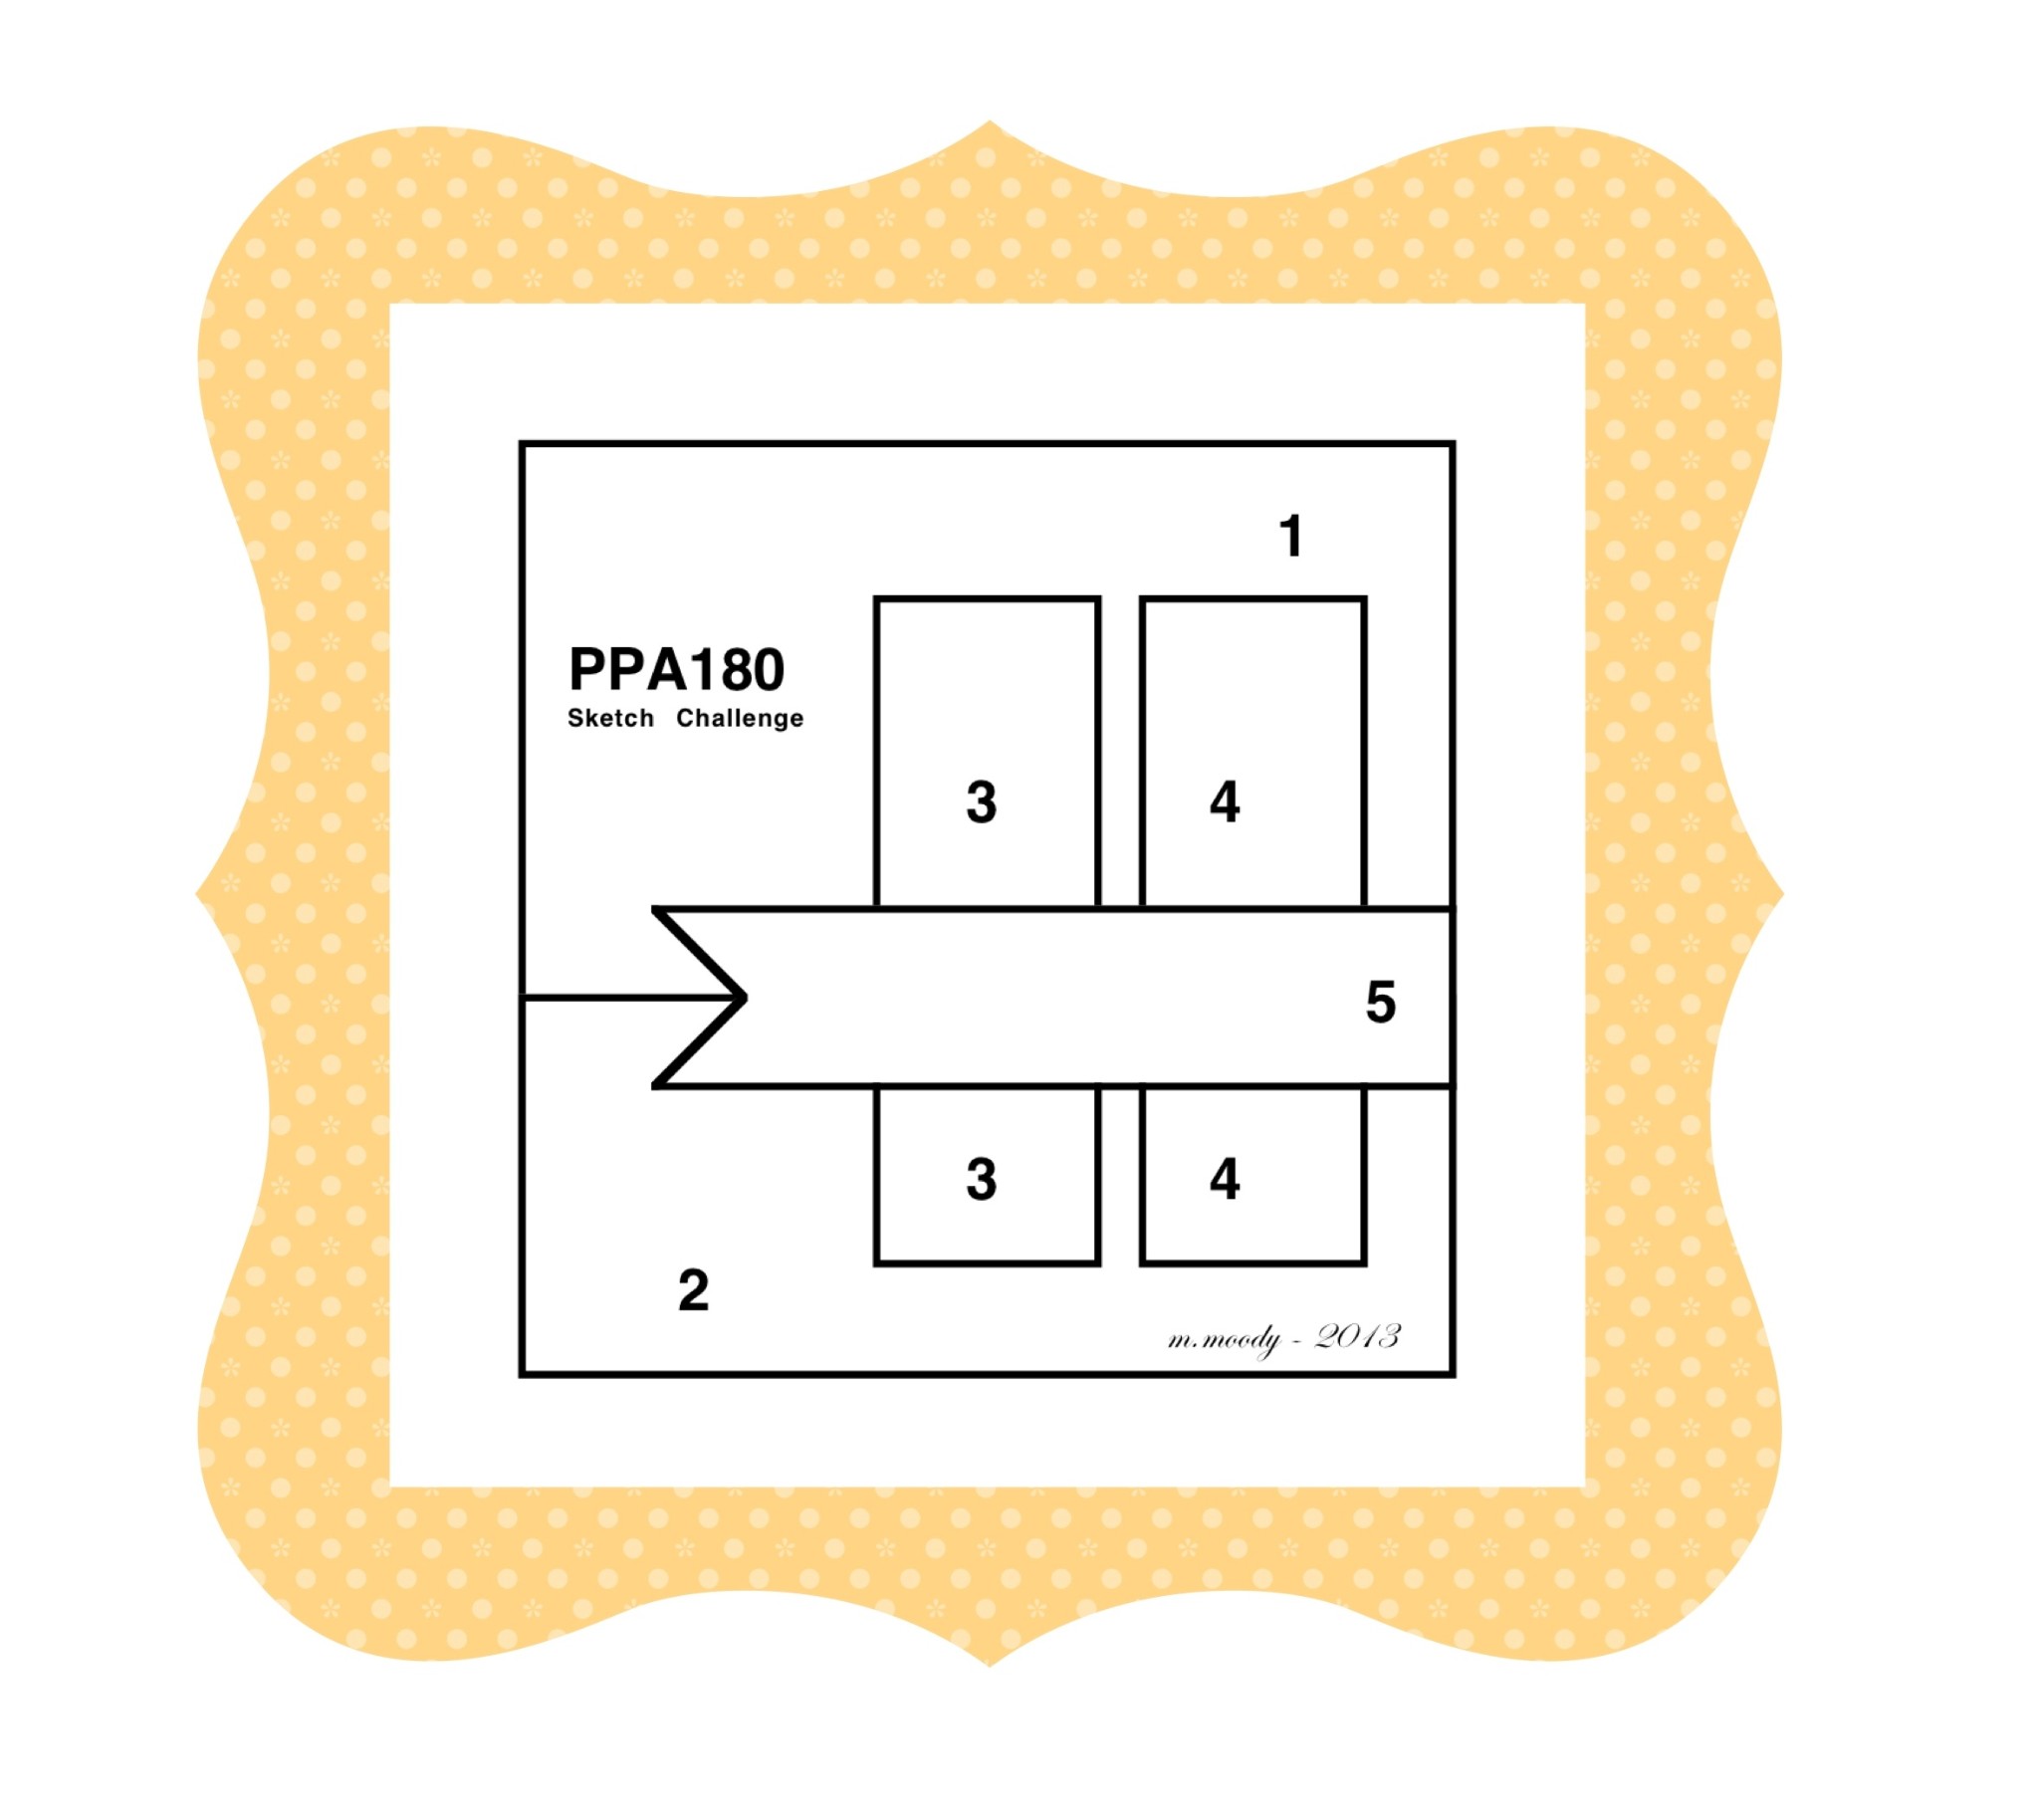
Oh! And I forgot to mention that I do not like to make square cards! Really, this sketch had me frazzled! I took a deep breathe and reminded myself "simplify". With that in mind, I chose a soft pattern from the 2013-2015 In-Color Designer Series Paper Stacks in Crisp Cataloupe for Layer 1. I thought about adding an embossing folder for Layer 2 but reminded myself "simplify". Okay, leave the white space alone, got it! But I don't usually leave the space where two different papers meet showing so I decided that the 3/8" Ruffle Stretch Trim would work in that space perfectly.

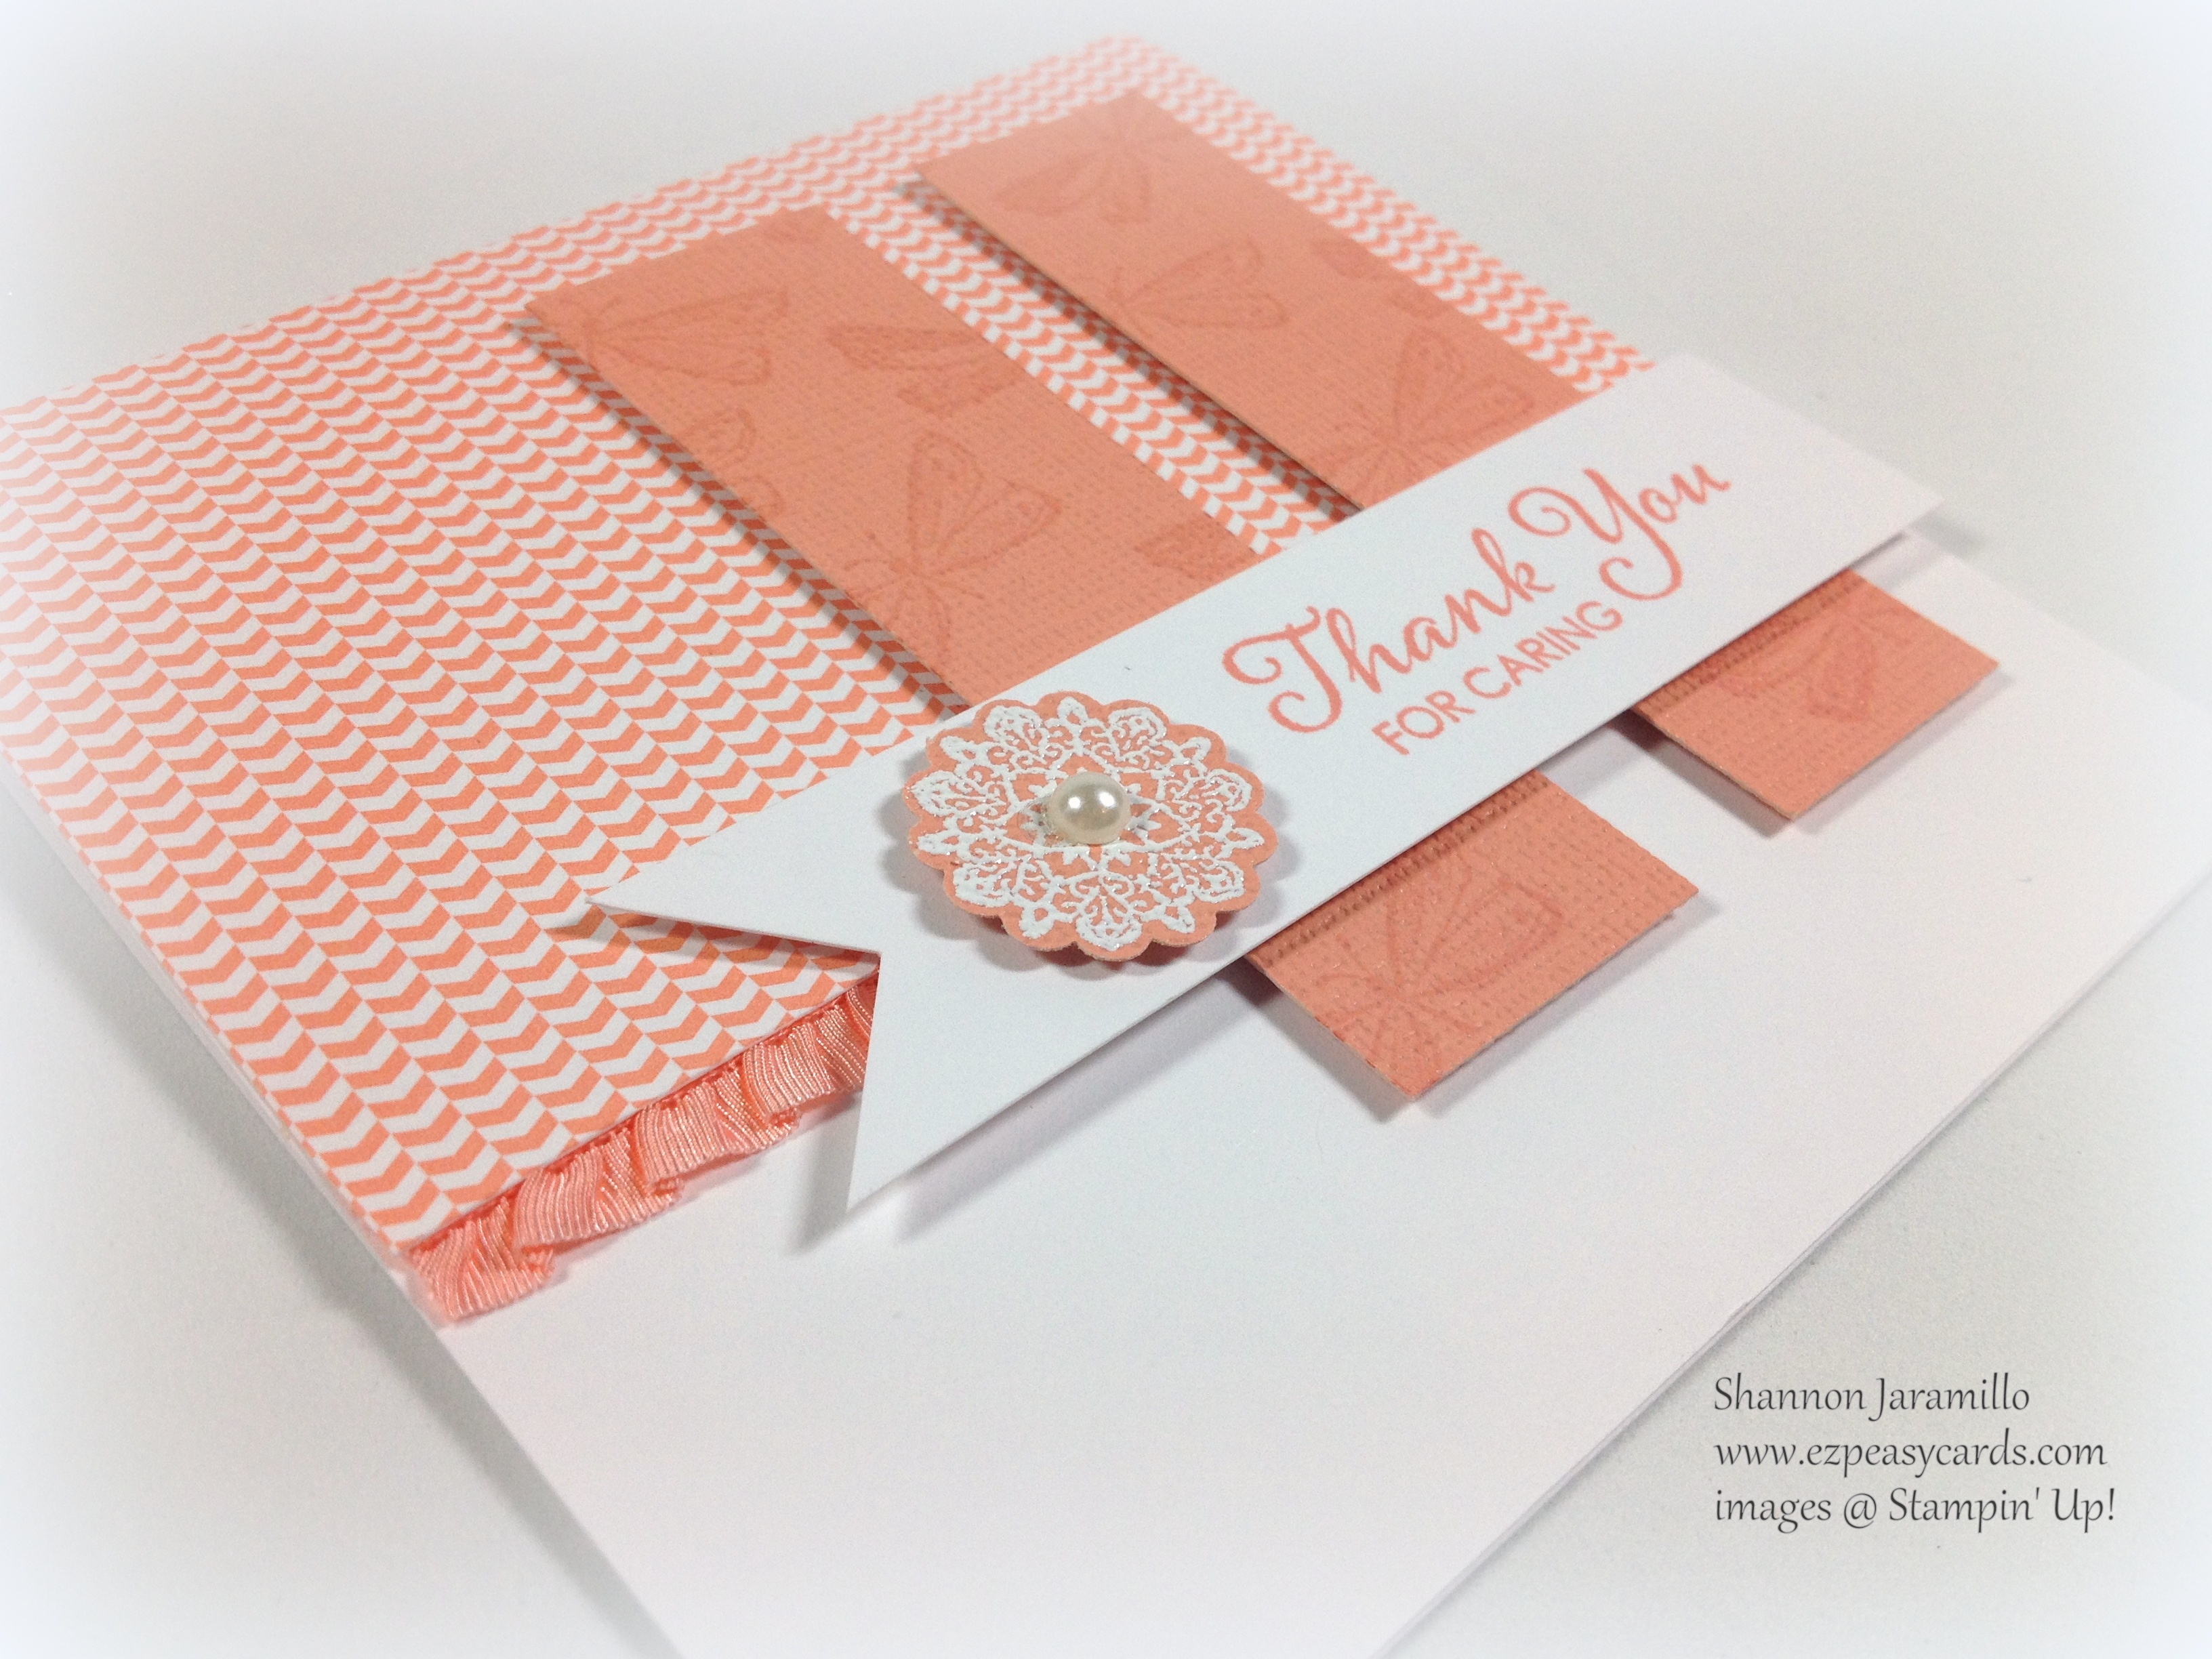
Layers 3 and 4 were killing me. In the spirit of simplifying, I just could NOT add two more patterns to my card! They were going to have to be plain cardstock. But not too plain...I chose to use the Core'dinations cardstock to add a bit of texture. When I added them to my card, they were still too plain. I browsed through my stamp collection and decided that this whimsical little butterfly from the Best of Butterflies Stamp Set would work perfectly!

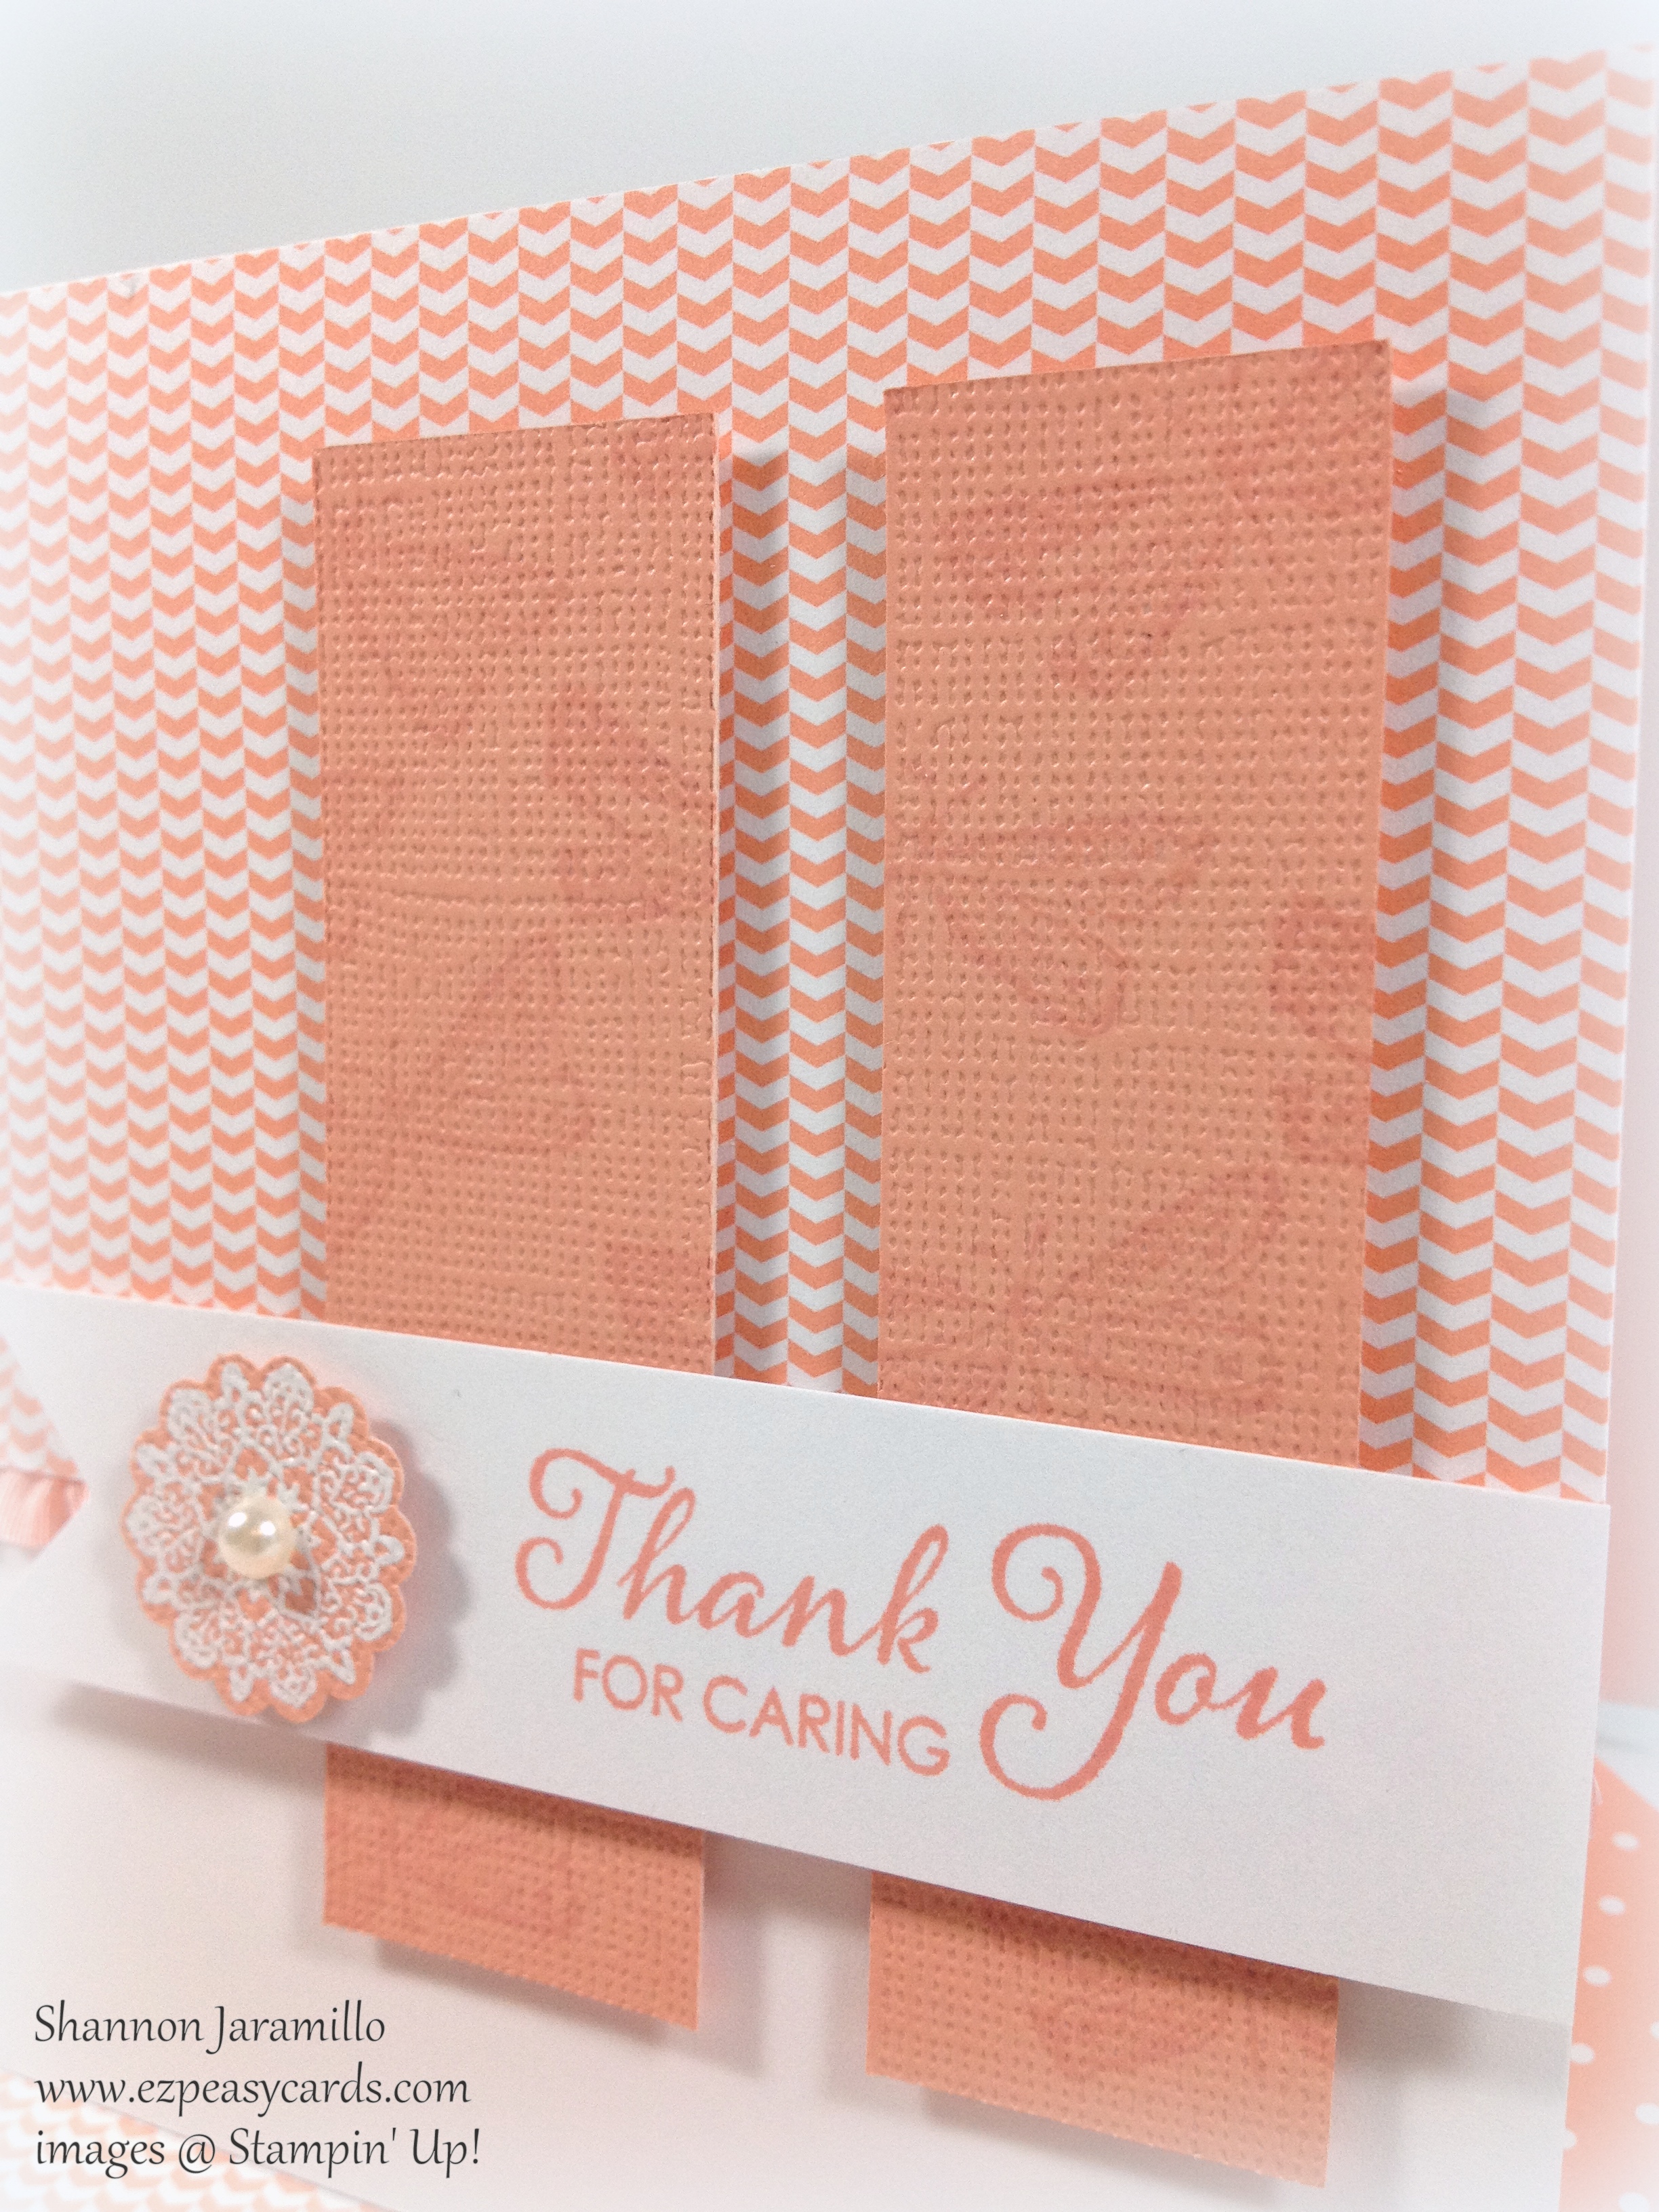
I had already cut the two pieces of cardstock out so I lined them up side by side on my work surface and adhered them down with a bit of SNAIL and then set to work covering both pieces with butterflies stamped in Crisp Cantaloupe. Once stamped, I adhered them to my card with Stampin' Dimensionals. They made a very soft background. Perfect for my simple card!

Next came Layer 5, the simple banner with a sentiment...but which sentiment? Hmmm...I reached for the Lots of Thanks Stamp Set (after all you can never have too many of those, right?) and saw this sentiment, perfect for the size of my banner and in a soft, whimsical font, very well suited for the color and the butterflies. And done! Well, almost. The card still needed something but I had no idea WHAT.

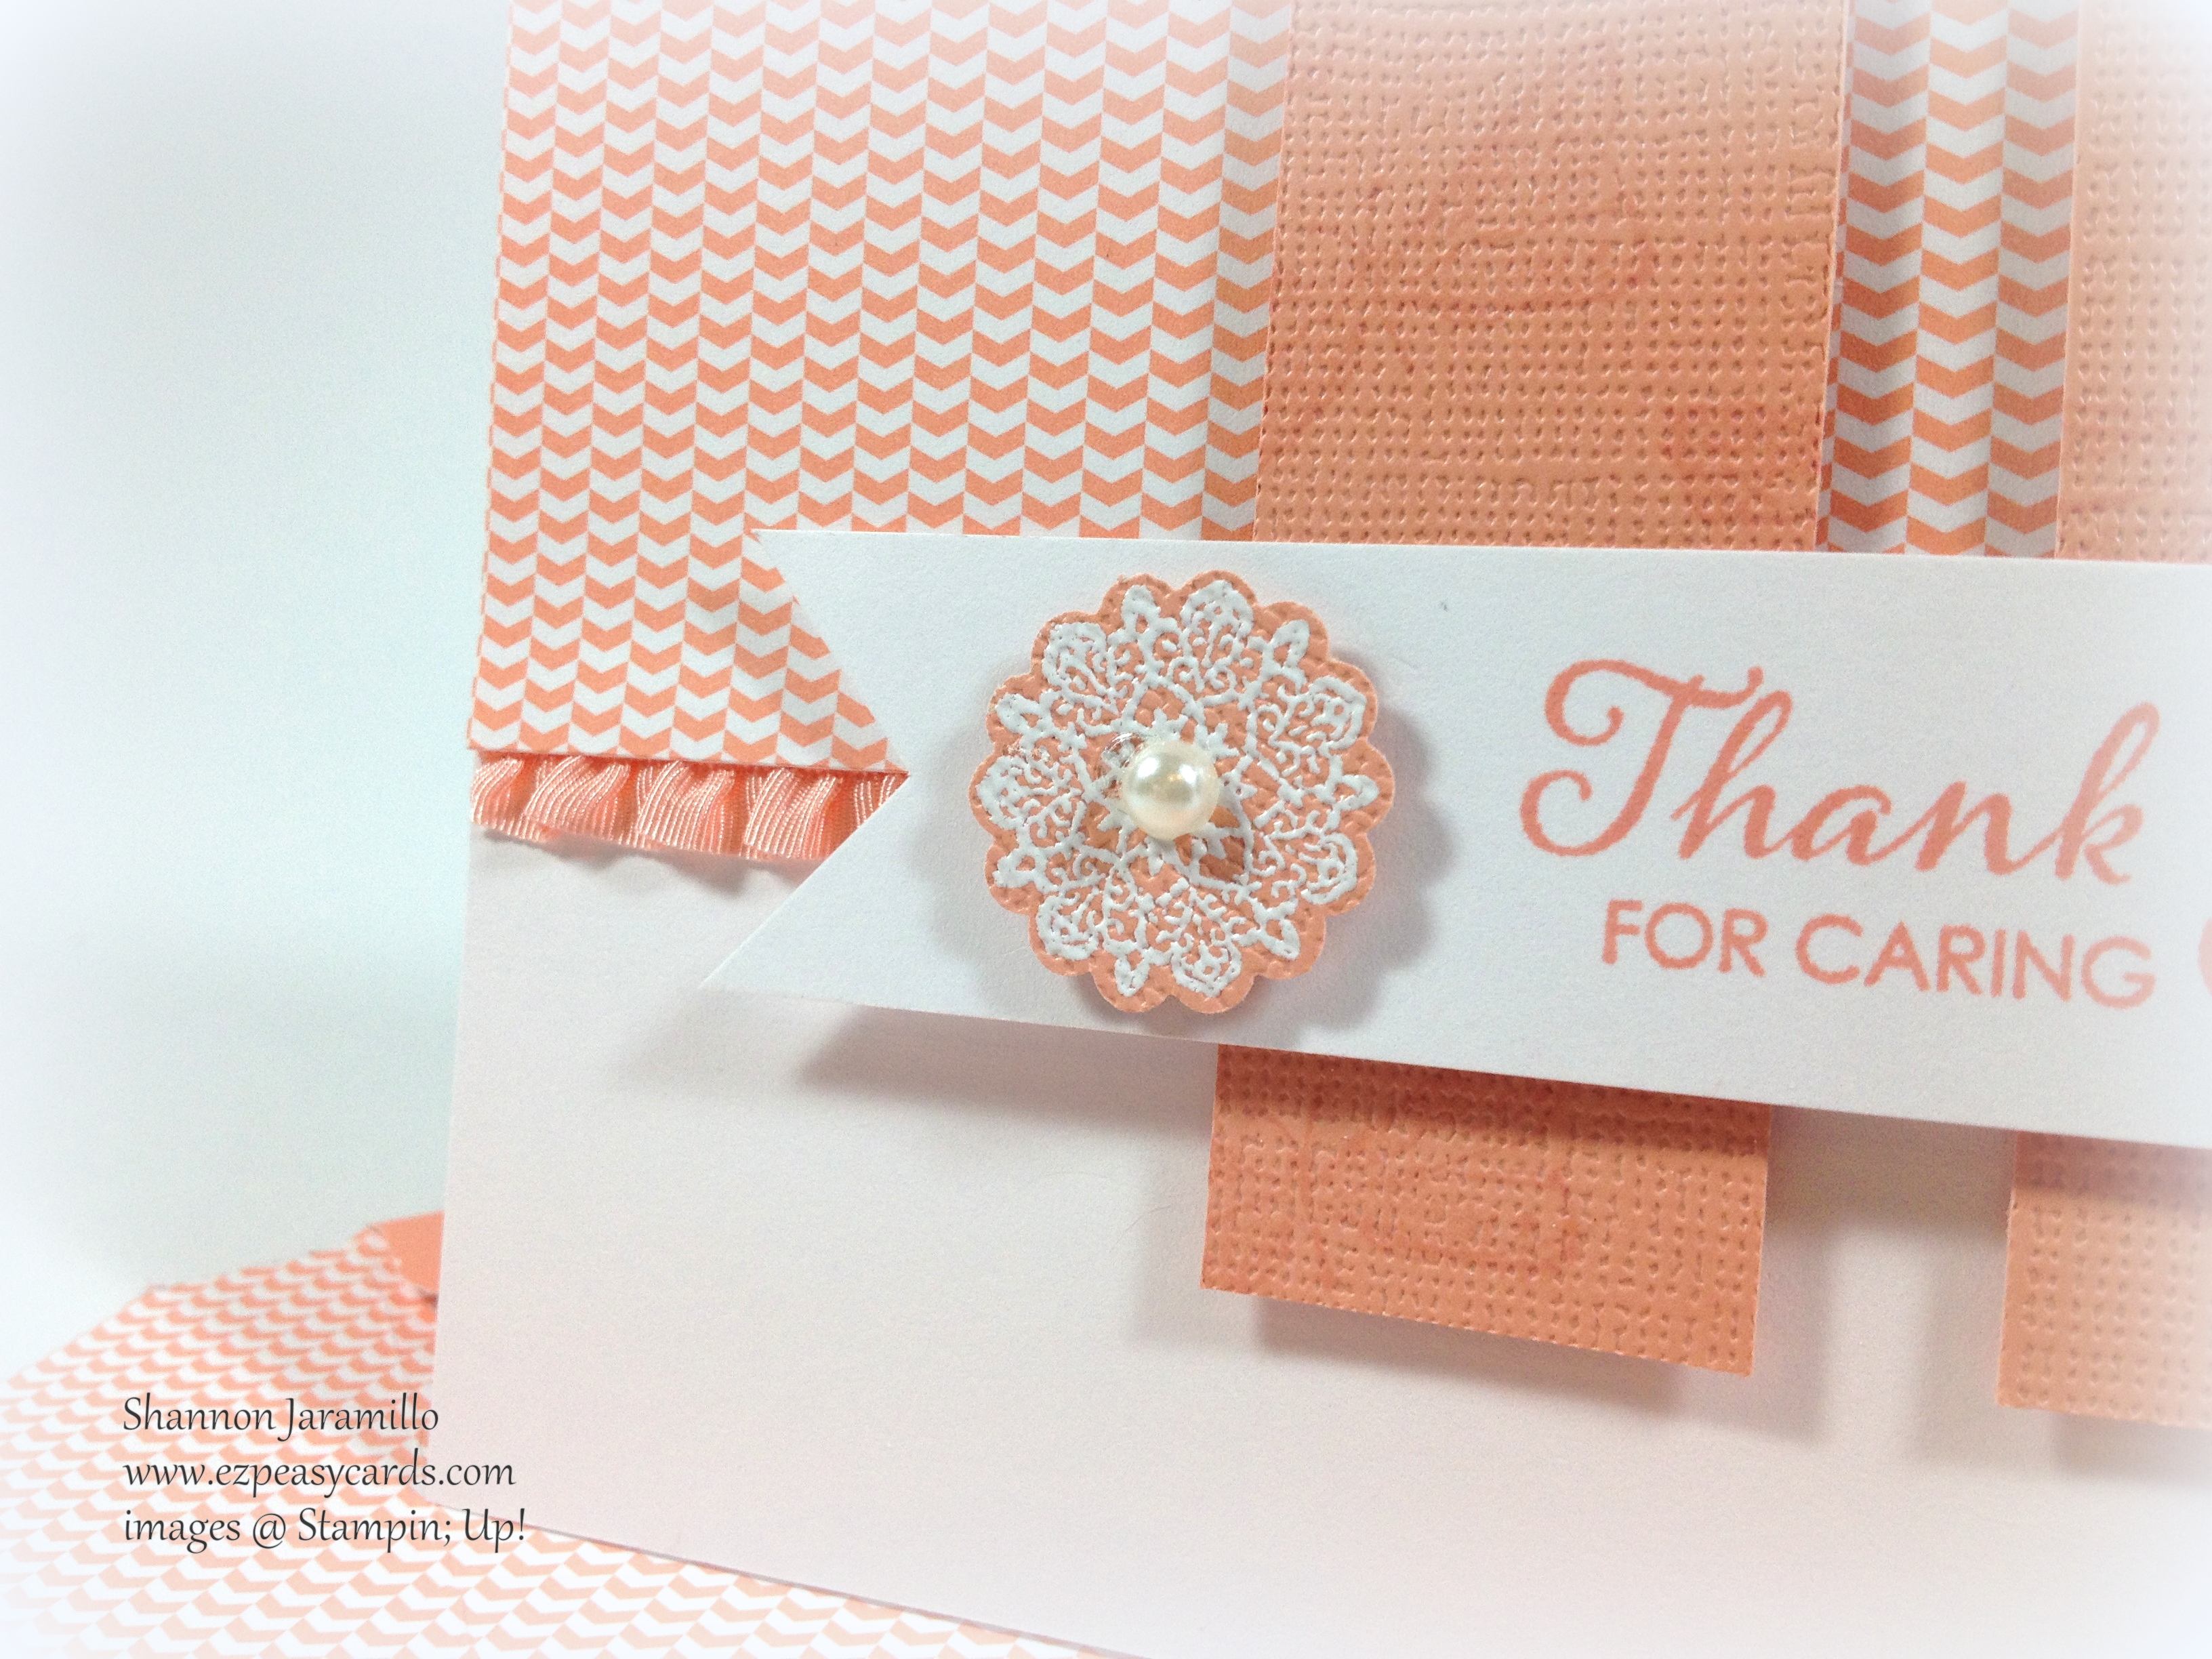
So I did what I always do when in this predicament. I walked away and went to bed. Came back and pondered the card again in the morning and walked away again. Then in the middle of doing something completely different it hit me! I jumped up and ran into my craft room again. Browsed briefly through my stamp collection again and came across the stamp set A Round Array. It has a medallion stamp that would be perfect! So I stamped the image onto the Core-dinations Cardstock in VersaMark Ink and then used my Heat Tool to heat emboss the image with White Embossing Powder and punched it out using the coordinating 7/8" Scallop Circle Punch. Popped it onto a Stampin' Dimensional and added a Basic Pearl for the final touch. Whew! And there you have it. How a card is born!

I actually wasn't quite done. Since I decided to go with the flow and make a square card, I now needed to make a matching envelope. The Envelope Punch Board make easy work of that. It really is a very versatile tool!

Some cards pop into my head complete, others are born kicking and screaming. This was a hard one but I am so, so very happy with how it turned out. Please let me know what you think and thanks for sticking with me through the story of how this card was born!

Stampin Supplies: 

Stamps: Best of Butterfies (133345), Lots of Thanks (129690), A Round Array (129090)

Paper: Whisper White (124302), Cardstock; 2013-2015 In-Color Core'dinations Cardstock (129958); 2013-2015 In Color (1130136) Designer Series Paper Stacks

Ink: Crisp Cantaloupe (131176) Classic Stampin' Pad; VersaMark Pad (102283)

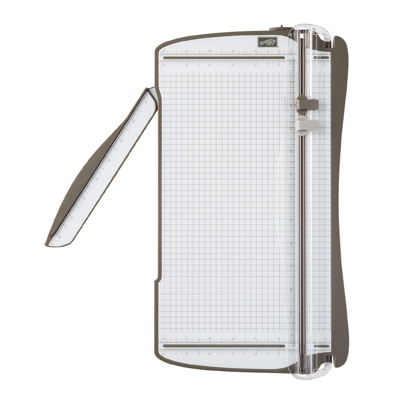
Tools:  Heat Tool (129053); White Embossing Powder (109132), Embossing Buddy (103083); 7/8" Scallop Circle Punch (129404); Envelope Punch Board (133774); Stampin' Trimmer (126889); Stamp-A-Ma-Jig (101049); Stampin' Dimensionals (104430)

Embellishments: Crisp Cantaloupe 3/8" Ruffle Stretch Trim (130021); Pearls Basic Jewels (119247) 

Wednesday
Nov202013

Save Up to 50%, The Stampin' Up! Holiday Sale Starts Today!

STARTS TODAY!  The Stampin' Up! Holiday Sale is one of our biggest sales of the year!  Save up to 50% on a large selection of items.  Be sure to use the bundle product numbers when ordering any specially priced bundles.  CLICK THIS PRINTABLE FLYER to see ALL Holiday Sale items

24 HOUR DOORBUSTERS SALE--NOV. 20 ONLY!  Save 30% on these Stampin' Up! favorites:  Stampin' Trimmer (126889), Simply Scored Diagonal Plate (125586), Many Marvelous Markers (131264).


ENJOY MORE SAVINGS WITH THE STAMPIN' UP! WEEKLY DEAL!  See what's on sale this week!

HOLIDAY DELIVERY!  Stampin' Up! suggests you place any orders by Dec. 17 for arrival by Dec. 24.  There are no guarantees on delivery date so the earlier the better!

Tuesday
Nov192013

Sweater Weather Seasonal Decor

Hello again! Today I have a little project to share with you. One that has me out of my card comfort zone and into the world of 3-D, paint, sandpaper, and glue guns. But it was worth it! These little guys are going to go with me to work and bring a little seasonal cheer to my office!

Aren't they FUN??

I found these cute little trees online here and I knew at once that they had to come live with me!

The wood pieces come unfinished and unassembled so I ran and picked up some generic craft paint and set right to work! After several coats of paint I sanded the edges of the trunks down to give them a rustic feel.

I then adhered Stampin' Up!'s Sweater Weather Designer Series Paper to the trees with Modge Podge and used my glue gun to glue the trunks to the tree tops. I sponged Chocolate Chip ink around the edges of the paper to add definition and then decorated with Linen Thread and buttons! EZ Peasy!

Here's a closer look at the sponging and details :)

I would love to hear what you think of my fall trees!

Stampin Supplies: 

Stamps: None

Paper: Sweater Weather (132184) Designer Series Paper

Ink: Chocolate Chip (126975) Classic Stampin' Pad

Tools: Sponge Daubers (102892)

Embellishments: Naturals Designer Buttons (127554); Subtles Designer Buttons (130030); Natural Linen Thread (104199); Antique Brads (117273); 1 1/4" Burlap Ribbon

Other: Wood Trees, Craft Paint, Fine Sandpaper, Modge Podge, Glue Gun

Saturday
Nov162013

Clean and Simple Saturday - Sweetly Framed

Good morning friends and happy Saturday to you! Today I have a fun little card to share with you...

This card was inspired by a store bought card (I know, gasp, right?) that my husband gave to me. I always liked it and pulled it out recently and thought "I bet I could make something similar"...

I know I have used the Eastern Elegance Designer Series Paper in not one, but two, posts this week...but I am really loving the soft prettiness of the designs!

I used my Squares Collection Framelits to make my frame and filled it in with leaves die cut using the Little Leaves Sizzlits Die. I used the die to die cut the stems of leaves in two colors, Pear Pizzazz and Wild Wasabi. Then I placed the one stem of leaves, cut in Pear Pizzazz, into the frame and carefully glued leaves cut from the other stem of leaves in Wild Wasbi right on top of the first set of leaves! I also carefully spliced an extra stem of leaves in Wild Wasabi in, just to fill it in a bit.

And that's it! Add a simple sentiment, this one is from the stamp set A Dozen Thoughts and is an absolute favorite of mine...I just L-O-V-E all the fonts in this set!

Here is a sneak peek of a little project I have been working on...

Please check back on Tuesday for my post or to sign up to have my blog posts delivered to your inbox so you don't forget...I am so excited to share it with you!

Thanks and have a great day!

Stampin Supplies: 

Stamps: A Dozen Thoughts (131059)

Paper: Whisper White (100730), Pear Pizzazz (131201), Wild Wasabi (108641) Cardstock; Eastern Elegance (130131) Designer Series Paper

Ink: Pear Pizzazz (131180) Classic Stampin' Pad

Tools: Big Shot (113439); Squares Collection Framelits (130921); Little Leaves Sizzlits (114511); Stampin' Trimmer (126889); Stamp-A-Ma-Jig (101049)

Embellishments: None

And here's a close up of the details of the leaves. It's a bit embarrassing to show them this close up because all the flaws are exposed, but I wanted to show you how simple it can be!

Page 1 ... 3 4 5 6 7 ... 28 Next 5 Entries »